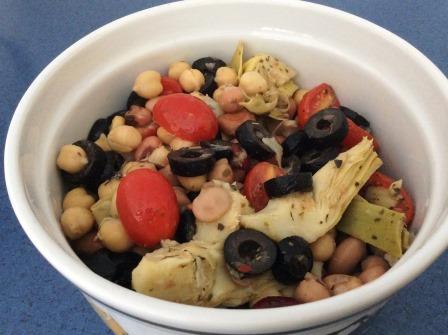
I’ve been making this salad for years. It is so easy and really delicious. It’s a great side dish to poultry or fish mains (especially if they have a Mediterranean theme), and a perfect dish to bring to a picnic, potluck, or BBQ. You can make it more substantial by adding a cup or so of cooked quinoa.
What You’ll Need:
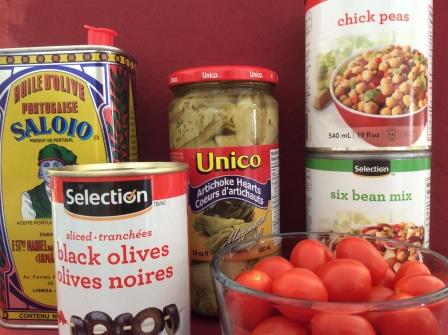
This is an easy recipe because you don’t have to be precise with the ingredients. Add more or less of whichever ones you like. I usually use the following:
- a can of pitted black olives (sliced ones or whole ones cut into halves)
- a large jar of marinated artichokes (try to find ones that aren’t in canola oil) or a can of artichoke hearts packed in water. I had a jar of the marinated artichokes on hand that someone had brought over, so I poured it into a colander and drained off the oil. The herbs in them added some flavour. Cut the artichoke hearts into quarters if they aren’t already.
- a package or so of cherry or grape tomatoes, cut into halves
- a can or two of chick peas. I had one can of chickpeas and one can of a six bean mix on hand, so that’s what I used this time
- about 1/4 cup extra virgin olive oil
- salt and pepper to taste
- fresh or dried oregano and/or basil and/or prepared Italian herb mix to taste
Step 1: Mix It Up
Put all the ingredients into a large bowl, drizzle with the olive oil (add as much or as little as you like), then add the salt, pepper, and fresh or dried herbs to suit your taste. I like to start by adding a little of the seasonings, then mix, taste, add more if needed, mix, taste … you get the idea. Mix well and you’re done!
Feel free to toss in other ingredients that you think would be a good addition to this salad … maybe some hearts of palm, some fresh walnut pieces, and/or some toasted pine nuts. This salad keeps fairly well in the fridge for a few days.
Enjoy!

 I teach nutrition classes at the
 elsewehere – and when we eat those shrimp, we also ingest the antibiotics and disinfectants they were exposed to. Some of these chemicals/pesticides are neurotoxins (neuro = nervous system; toxins = poisons); that is, they can harm delicate nervous system tissue, including the brain. Think ADHD, Parkinson’s and memory loss as examples of health issues that can be caused or exasperated by neurotoxins.

 It seems that those who have a vested interest in the mobile market were not concerned with this test, or with the fact that many scientists claim that current safety levels and testing procedures are out of date as they don’t reflect current technology and the way cell phones are currently used. They also argue that the research is not conclusive.
 the
the