February is Heart Health Month, so what better time to share some tips for maintaining and/or improving cardiovascular health!
#1 – Avoid sugar.
 Not just the white stuff you add to coffee, tea, and baking, but sugar in all its forms, including foods that can quickly raise blood sugar levels such as processed grains and products made with them (think pastas, breads, crackers, baked goods), white rice, potatoes, and corn … and products made with their high glycemic flours or starches, including many gluten-free products (BUYER BEWARE! gluten-free doesn’t mean ‘healthy’ – read the labels!). Soft drinks are the worst contributors to North America’s sugar-related health problems, and while diet soft drinks might sound like a healthier alternative, the artificial sweeteners that replace sugar carry a whole host of other health issues. Thirsty? Drink water! The bottom line: high blood sugar and insulin levels (the hormone that tries to bring down our blood sugar) irritate and inflame the lining of our blood vessels, which is a major risk factor for cardiovascular disease.
#2 – Eat more veggies.
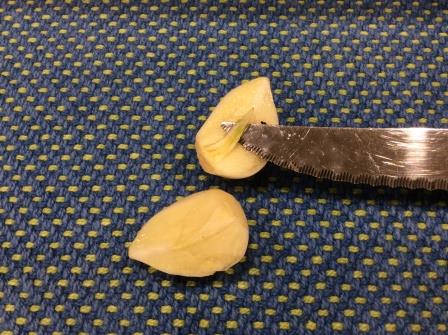
 Select a variety of colours and strive to make your lunch and dinner plate at least 50% veggies. Beets, dark leafy greens, asparagus, carrots, broccoli, tomatoes, red bell peppers (eat the white pithy parts on the inside too!), garlic, leek, and onions are often associated with heart health.
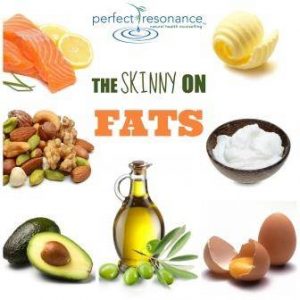
#3 – Eat fat.
 Yes, I said eat fat … healthy fat, like eggs (the yolk too!), coconut oil, butter (ditch the margarine!), extra virgin olive oil, and avocado oil to name a few. The topic of fats is one of the most misunderstood topics in nutrition, and being misinformed on this topic can be hazardous to your heart-health and overall health. Get the lowdown on fats by watching my pre-recorded Skinny on Fats webinar.
#4. Snack on raw nuts.
Many nuts, including almonds, walnuts, and pecans are a good source of hearty-healthy fibre, magnesium, and fats. Studies show that eating raw nuts reduces the risk of  heart disease. While almonds are popular, I encourage you to change it up and eat a variety of different raw nuts – pecans, cashews, macadamia nuts, Brazil nuts, hazelnuts … you get the picture! They all offer unique nutrients and health benefits. In general, an ounce of nuts per day (about a handful) is an acceptable serving.
#5. Take supplements.
 With busy lifestyles and often less-than-optimal food choices, heart health can benefit from some support. After all, the heart is the hardest working muscle in the body, beating constantly to keep us alive. While there are numerous supplements that support heart health (e.g. B12, Vitamin K, Vitamin D, magnesium), two very important ones are fish oil and Coenzyme Q10. It’s particularly important to supplement with CoQ10 if you are taking cholesterol-lowering statin drugs (which are often not necessary … you may want to read this blog about cholesterol).
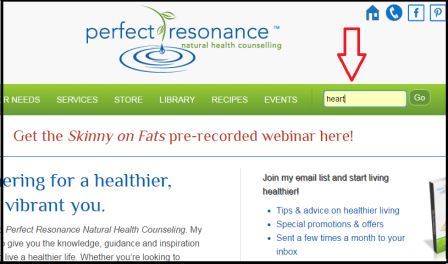
I’ve written quite a few blogs on cardiovascular health over the years. You can find them by typing the word ‘heart’ in the search box on my website (See where the big red arrow is pointing in the image below? That’s what I’m talking about) Show your heart some love and give it a whirl! In fact, give it a whirl with any health or nutrition topic you’re interested in!
Take control of what you can for a happy, healthy heart!


 This is good news and bad news. Why? Well, the good news is that people want to get healthy. The bad news is that they’re looking to the internet for advice on how to do that. I can tell you from years of personal and clinical experience that a lot of the health and nutrition information out there on the World Wide Web is contradictory, confusing, based on poor science (or no science at all!) and just plain wrong … including a comment in the article that says if your resolution is to lower your cholesterol, just stop eating seafood! I’m not promoting seafood, but for most people with cholesterol issues, eliminating seafood won’t make much of a difference, if any at all. It’s no wonder that rates of obesity, diabetes, and cardiovascular disease are worse than ever – including among children.


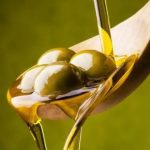 Olive oil is made by pressing olives – and since olives are fruit, olive oil is ‘fresh-squeezed’ olive juice. Just like other juices out there, there are good ones and bad ones. The ‘king’ of olive oils is authentic extra virgin olive oil, or EVOO for short.
 The book “
 which have been around for thousands of years! Imagine … the olive oil in your pantry could have come from the same olive trees that provided Julius Caesar with olive oil!
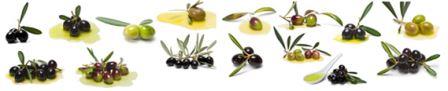


 EVOOs often have a harvest and/or production date on the bottle or tin. It should be no more than a year earlier than the date you are buying the oil. You should also aim to use the oil within 12 to 18 months of the harvest date. Unlike some wines, olive oil doesn’t improve with age. The flavour and health benefits are best immediately after it is pressed and start to decline within 3 to 6 months of packaging.
 authentic EVOO, use it raw; that is, do not heat it or cook with it. Instead, drizzle the raw oil on salads, raw or cooked vegetables, hummus, dips, spreads, and on cooked dishes once they have been removed from heat/served. While you can cook with EVOO, use low heat as high heat can break down the oil’s health-boosting properties and could potentially denature it.