Easy Peasy Homemade Almond Milk and Meal/Flour

In just a few minutes, you can make your own delicious almond milk! You’ll need raw almonds, filtered water, a pinch of sea salt, a sieve, cheesecloth (or any thin cloth that will work the same way), and a blender. Let’s get started!

Step 1: Prep

The night before you want to make almond milk, take one cup of raw almonds, 2 cups of filtered water, and a pinch of unrefined sea salt.
IMG_0730Put the almonds, water, and salt in a bowl. You want the almonds to be completely covered by the water – under at least a couple of inches of water – so add more water if necessary. Leave on the kitchen counter to soak overnight.

The next morning you’ll see that the almonds have swelled/plumped up, soaking up much of the water.

Drain the water and rinse the almonds well.

Step 2: Mixing

Put the almonds in a blender with 4 cups of filtered water. That’s right. Just 2 ingredients needed to make almond milk: filtered water and soaked raw almonds. Compare that to the ingredients listed on store bought brands. One ingredient you should avoid is carrageenan, as it can be a bowel irritant…and it’s not just in almond milk. Read labels!
IMG_0735Blend on high speed for a few minutes until the almonds are pulverized and you have a nice, smooth liquid. I use a Vitamix…love it.

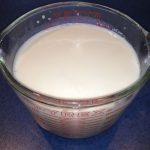
Pour the contents of the blender through a cheesecloth lined sieve balanced over a measuring cup or bowl (I’m using a very worn-out, thin napkin that I’ve had since the beginning of time – works great!).

Doesn’t it look yummy?

You’ll likely have to gently stir the blender mixture a bit to help the liquid drain through the cheesecloth and sieve. It will start to get quite thick towards the end as most of the liquid drains away from the pasty, wet almond meal.IMG_0739

Gather up the sides of the cloth and gently squeeze and twist the top of the bundle to squeeze as much liquid as you can out of the wet almond meal, which won’t go to waste, because now you’re going to spread it out onto a parchment paper lined baking sheet.


Step 3: Cooking

IMG_0745Next, put the baking sheet with the wet almond meal spread on it, into a low oven (150F would be good…mine only goes as low as 170F) for about 1.5 hours until it is completely dry and crumbly and no longer sticks together. Check it every 30 minutes or so and break up any bigger clumps with your fingers so that it dries evenly. Once it’s completely dry, remove it from the oven, let it cool, and rub it all between your hands until it has the consistency of coarse flour. This will be delicious to use in baking of all kinds. I love making quiche crusts with it (just add some melted butter and press into the pie plate).

As for the almond milk, you’ll end up with about 4 cups.

Step 4: Serving

IMG_0750Enjoy as is, or if you want, you can add a touch of sweetener (e.g. maple syrup), and/or vanilla extract, and/or cinnamon. Use anywhere you would use milk.

To store, pour into a glass bottle or jar, seal with the lid, and keep in the fridge. It should last for 3 or 4 days (no preservatives means it won’t last for weeks and weeks!). Let me know if you try this and how you like it.

 

Time to Kick off Your Shoes

Spring is finally here!  There are so many things that I love about this time of year, and one of my favourites is to ditch the boots…then shoes…then socks, and walk around barefoot – especially on cool grass. I’ve been known to run around barefoot in my backyard early in the morning, when there is cold frost or dew on the grass. It’s very invigorating!

Even in the winter, I prefer to be barefoot when I’m indoors at home. There is simply something about being barefooted that makes me feel better. Interestingly, things that make us feel good on an intrinsic level – for whatever reason – are often good for our
overall health and well-being. Recently, I’ve read a few articles that have made
me more aware of why barefooting it is one of those things.

Walking barefoot on the Earth’s natural surfaces is known as ‘earthing’, and apparently, it is a scientifically researched topic.  According to the research, earthing can have profound positive effects on many areas of our health, including boosting the immune system, decreasing inflammation and pain, reducing stress, improving cardiovascular health, balancing hormones, and improving sleep . I’m betting most of us could you benefit from at least one of those!

The benefits of earthing appear to come from the relationship between our body’s electrical or energetic field, and that of the earth. It is well known that the earth has its own natural charge, or polarity, and research suggests that our body is happiest when it can ‘plug in’ to this source of electricity or energy.

If you doubt that our bodies are not only matter, but energy too, just think of common medical tests, such as an electrocardiogram (ECG) or electroencephalogram (EEG). Both start with the root word ‘electr/o’ which means electricity, and end with the suffix ‘gram’, which means a recording or measurement of something. These tests are designed to measure the electrical activity of two very important organs in the body – the heart (ECG), and the brain (EEG).

If that’s not enough proof that we’re full of electricity, voltage, ionic current, energy (choose your preferred term), consider that nerve impulses throughout our body are based on something called action potentials, which are short-term changes in the electrical potential of cell membranes. These action potentials are responsible for stimulating just about every function in the body. We’re more or less one big bag of salt water, which is known to conduct electrical current very well!

Studies on the benefits of earthing have been published in journals such as theJournal of
Environmental and Public Health 
and the Journal of Alternative and Complementary Medicine. A very well-known alternative physician, Dr. Joseph Mercola, has talked about earthing on the Dr. Oz Show, and recently wrote a detailed article on the topic. Here are a few excerpts from his article:

The scientific theory behind the health benefits seen
from this
 simple practice is that since the Earth has a greater negative charge
than your body, you end up absorbing electrons from it. This is, in my
understanding, one of the most potent antioxidants we know of, and may have an
anti-inflammatory and antioxidant effect on your body…

…To put it simply, it’s thought that the influx of free electrons from
the Earth’s surface will help to neutralize free radicals and reduce both acute
and chronic inflammation, which is at the root of many health conditions and
accelerated aging… 

…The effects of grounding appear to be so profound that researchers
suggest health practitioners prescribe outdoor “barefoot sessions” as
the weather permits. This is as simple as it sounds – you kick off your shoes
and socks and walk barefoot on the grass, the dirt, the sand or whatever
“Earth” is available to you. Studies suggest that benefits such as
pain relief and stress reduction may occur in just 30-80 minutes of barefoot
time a day…

This isn’t a new concept. Dr. Bernard Jensen, who was an internationally known pioneer in holistic and alternative health for over 60 years, recommended that patients at his health retreat centres walked outdoors barefoot every day, especially in the early morning when the ground was cold and wet. The cold stimulated the circulatory and lymphatic systems, and the dampness allowed for greater conductivity between the Earth and the skin on the soles of the feet.

Today, the health benefits of earthing have become so popular in some circles, that you can even buy ‘earthing pads’ to use indoors when the weather prevents you from doing the ‘real thing’. Apparently, these pads simulate the benefits of the Earth’s electrons.

Regardless of whether or not you’re ‘grounding’ yourself to a natural surface or an earthing pad, walking around barefoot still offers many benefits. As I have been trained in foot reflexology, I am well aware (as are many of my reflexology clients!) of the numerous beneficial effects of stimulating the bottom of the feet. In addition to just
being a wonderfully relaxing experience that anyone can enjoy on a regular basis – and a real treat for tired feet, Reflexology offers numerous benefits, including:

  • improves circulation of blood and lymph
  • normalizes body functions
  • releases tension and reduces stress
  • promotes relaxation, rejuvenation and repair by stimulating the parasympathetic nervous
    system
  • increases energy
  • boosts the immune system

Going barefoot is a bit like giving yourself a wee reflexology treatment, all be it a very general one.

In addition to all of the ‘functional’ health benefits associated with barefooting it, there are also structural benefits. Anyone who is familiar with orthotics knows that providing the feet with proper support can relieve pain from our neck to our toes by improving our posture in general. Ironically, many of our foot problems likely developed from spending
too much time in shoes; after all, we did just fine without them for a few million years!

Many sources claim that the ‘artificial’ support of shoes allows the muscles of our feet to become ‘lazy, and that by walking barefoot, we can retrain or ‘reboot’ these muscles (and ligaments, tendons, and bones) to shape up and strengthen. This offers many benefits, including better arches, stronger ankles, stronger legs, alleviated knee and back pain, better balance, better posture, and better support for our entire body (which will likely prevent falls that can have serious outcomes, especially as we age). Some sources even claim that foot conditions such as bunions and hammertoes resolve themselves as feet get stronger and healthier thanks to barefooting it.

I think it’s great that something that feels so wonderful has the potential to positively affect so many areas our overall health and well-being. If you rarely ever walk around in bare feet, start slowly, perhaps indoors, until you get used to it. Before you know it, you’ll be looking forward to every opportunity to kick off your shoes!

Enjoy!

References

  1. http://articles.mercola.com/sites/articles/archive/2012/09/20/barefoot-on-electron-deficiency.aspx
  2.  

How to Make Your Own Almond Milk

In this video, you’ll learn how to make your own delicious almond milk. It’s easy!

Autism: Early Intervention is Key

This month’s tip was written on April 2nd, World Autism Awareness Day. Every year, autism organizations around the world celebrate the day with fundraising and awareness-raising events. I would like to do my part by telling you about an amazing organization, located here in Ottawa, called QuickStart Early Intervention for Autism.

QuickStart’s mission is to see that all children have equal opportunity to develop to their full potential through early intervention.

The statistics as of March 2012 show that autism affects 1 in 88 children (1 in 54 boys, and 1 in 50 school aged children). This is a 78% increase in reported prevalence in the last 6 years…and it is expected to keep increasing.

It is widely agreed that while early intervention is key, many support services are not provided until there is an ‘official’ diagnosis.  Most children don’t get officially diagnosed with autism until they are around 4 years old – and even older for children with other ‘disorders’ on the spectrum, such as Asperger’s. Considering that many sources state that autism can be accurately identified at 24 months (or even sooner), there is a lot that needs to be done in the area of early identification and intervention.

That’s what motivated Suzanne Jacobson to start the charitable organizationQuickstart Early Intervention for Autism in early 2008. Having grandchildren of her own who have been diagnosed with autism, Suzanne quickly recognized the dire need for services to assist families as soon as they suspect that their children may have developmental issues. For Suzanne, that happened when her first grandson was 18 months old and had to wait for almost a year for an assessment and confirmation that he had autism…and another 2 years for the start of intensive intervention. Here is a short excerpt of Suzanne’s story:

“I was very concerned about the long waiting times.  Everything I read said that early intervention was key, and yet nothing was happening.  I would wake up in the middle of the night in a panic knowing time was working against us. We needed to do something now.  Our family decided to enroll him in private therapies even before he received his diagnosis.

I know that by providing early intervention for Alex we helped to give him the best possible start – an opinion that is supported by research studies around the world. We were fortunate that we could afford private therapy.  But what about the parents who can’t?  Their stress levels had to be even higher than mine.  I felt I needed to do something because every child deserves the same opportunity, whether or not their families can pay for private treatment … and so I began QuickStart.”

Since it was founded, Quickstart has made numerous contributions to assist families with early intervention, including helping to fund the ‘Getting Started Services Clinic’ (which has helped over 800 children).  The coverage area for the clinic includes Ottawa, Kanata, Renfrew, and Cornwall. From this, other clinics and programs were created, including:  Wee Start Clinic, which sees children 21 months and under who are showing signs of developmental delay; ‘ReFresh ReStart’, a respite program that offers parents of autistic children the much needed and rare opportunity to have some time alone through one and two night stays, (made possible through the generous support of local hotels); and KickStart, a new pilot program for children 30 months and under, designed to provide ongoing therapy services and parent coaching, over a period of one year, with trained professionals. QuickStart also offers free workshops to parents on various topics.

If you aren’t impressed yet with the number of incredible services offered throughQuickStart Early Intervention for Autism, here’s something else to consider – all QuickStart programs are offered at NO COST TO FAMILIES and in both English and French. This is no small feat, considering that QuickStart received NO GOVERNMENT FUNDING, and relies on the generosity of its donors. It operates solely through volunteers, which means that almost all donations go directly to supporting programs.

For more information on QuickStart, I encourage you to visit www.quickstartautism.ca, and if you or someone you know has a child (or children) with autism, please share this valuable information with them.

Every family should have the opportunity to provide their children with the best possible chance to overcome, or learn to cope with, the life-long challenges that often accompany autism. Early intervention is critical and desperately needed! I hope you will join me in helping Quickstart to continue to offer all of its amazing programs throughout our community. The best way to help is to donate, and I plan on doing that as soon as I finish writing up this tip.  I’m also honoured to be donating a half day nutrition-related workshop through QuickStart’s parent workshop program.

Note that QuickStart is a Registered Charity…and thanks to some new tax measures introduced in last month’s federal budget, it is my understanding that ‘first-time donors’ (defined as someone who hasn’t claimed a donation credit after 2007), will be entitled to a 40% federal credit for cash donations (as opposed to donations of property, or donations ‘in-kind’) of $200 or less, and a 54% federal credit for donations of over $200, up to $1,000. Apparently this is a temporary credit to encourage ‘first-time donors’, so if it applies to you, now is a great time to make a donation to Quickstart! (One of my colleagues shared this info with me just as I was writing this tip – so thank you – and you know who you are!)

In closing, I ask that you please watch this 15 minute video, My Autism and Me, that one of my clients recently shared with me (so thanks to you too – and you know who you are too!). It gives a beautiful perspective on how differently autism impacts the lives of children, and how they can embrace their differences and lead incredibly creative, inspirational, successful, and fulfilling lives when surrounded by understanding, patience, acceptance, love, and support.   Enjoy. http://www.youtube.com/watch?v=ejpWWP1HNGQ

How to Prepare & Eat Mangoes

In this video, I show you the best way to prepare and eat mangoes.

Aloe Vera: Prepare, Eat & Enjoy the Benefits

How to prepare, eat, and reap the benefits of aloe vera.

Pizza With a Cauliflower Crust

This grain-free pizza crust uses cauliflower as a base. It is delicious and easy to make. To ensure a crisp crust, it has to be spread out thin enough and baked until golden. The first few times I made this recipe, the crust wasn’t as crisp as I would have liked towards the centre, so we needed a fork and knife to eat the slices.

It was still absolutely delicious! We got the hang of it after a few times making this dish, and I think the crust would also be great using other grated veggies like sweet potatoes or turnips, although cauliflower’s mild taste lets the flavourful toppings be the stars of the pizza.

Step 1: Ingredients & Prep

IMG_0602Heat the oven to 450F. In a large bowl, mix together:

  •  3 cups of raw grated cauliflower
  •  1 beaten egg
  •  ¾ cup coarsely grated parmesan cheese
  •  1-2 TBSP chopped fresh parsley (basil and/or oregano would be great too – whatever you like!)
  •  2 TBSP olive oil
  •  Your choice of seasoning (e.g. salt, pepper) to taste. I used Herbamare

Turn the mixture out onto a parchment paper lined baking sheet and pat it down into a nice, thin (1/4 inch or so) pizza crust shape. Bake in the oven for 15 minutes. Check it around 12 minutes. You want it to be nice and golden and crispy all over. Careful not to burn it!

IMG_0608Lookin’ good!

Step 2: Add the Toppings

IMG_0607Make a tomato ‘sauce’. I just used freshly chopped grape tomatoes, a minced clove of garlic, a sprinkle of oregano, and a tablespoon or so of olive oil.

Spread the tomato ‘sauce’ over the cauliflower crust and add your favourite toppings. I used canned artichoke hearts (the ones packed in water), chopped up kalamata (greek) black olives, and sun-dried tomatoes

Step 3: Cooking

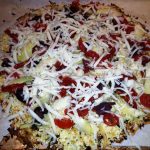
IMG_0605Once you have all your toppings on, sprinkle with grated cheese of your choice (raw if you have some!). Put back in the oven for about 4 or 5 minutes to melt the cheese. You can broil it for a few minutes if you like your cheese bubbly and golden.

Done! I started covering ours with raw arugula (optional but delicious!) before I remembered to take a picture of what it looked like right out of the oven. You can see a bit of what that looked like on the left side! The heat of the pizza will gently wilt the arugula. Mmmmm.

Step 4: Serving

IMG_0610Slice and enjoy! Depending on how thin and crisp you make your crust, the center of the pizza may be a bit droopy – but that’s usually the case with most wheat crusts anyway. Slice and enjoy!

p.s. I’ve yet to experiment to see if the crust would work if it was made with other types of grated veggies. Let me know if you do and what your results are. At the very worst, you’ll end up with a delicious au gratin of something!

Privacy Policy

Website Maintenance and Services by Andrew Wardell