February 15, 2013
By Anna Varriano
 [printfriendly]
This grain-free pizza crust uses cauliflower as a base. It is delicious and easy to make. To ensure a crisp crust, it has to be spread out thin enough and baked until golden. The first few times I made this recipe, the crust wasn’t as crisp as I would have liked towards the centre, so we needed a fork and knife to eat the slices.
It was still absolutely delicious! We got the hang of it after a few times making this dish, and I think the crust would also be great using other grated veggies like sweet potatoes or turnips, although cauliflower’s mild taste lets the flavourful toppings be the stars of the pizza.
Step 1: Ingredients & Prep
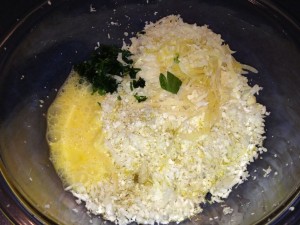
 Heat the oven to 450F. In a large bowl, mix together:
- 3 cups of raw grated cauliflower
- 1 beaten egg
- ¾ cup coarsely grated parmesan cheese
- 1-2 TBSP chopped fresh parsley (basil and/or oregano would be great too – whatever you like!)
- 2 TBSP olive oil
- Your choice of seasoning (e.g. salt, pepper) to taste. I used Herbamare
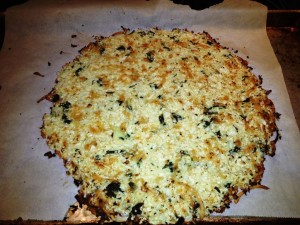
Turn the mixture out onto a parchment paper lined baking sheet and pat it down into a nice, thin (1/4 inch or so) pizza crust shape. Bake in the oven for 15 minutes. Check it around 12 minutes. You want it to be nice and golden and crispy all over. Careful not to burn it!
Step 2: Add the Toppings
 Make a tomato ‘sauce’. I just used freshly chopped grape tomatoes, a minced clove of garlic, a sprinkle of oregano, and a tablespoon or so of olive oil.
Spread the tomato ‘sauce’ over the cauliflower crust and add your favourite toppings. I used canned artichoke hearts (the ones packed in water), chopped up kalamata (greek) black olives, and sun-dried tomatoes
Step 3: Cooking
 Once you have all your toppings on, sprinkle with grated cheese of your choice (raw if you have some!). Put back in the oven for about 4 or 5 minutes to melt the cheese. You can broil it for a few minutes if you like your cheese bubbly and golden.
Done! I started covering ours with raw arugula (optional but delicious!) before I remembered to take a picture of what it looked like right out of the oven. You can see a bit of what that looked like on the left side! The heat of the pizza will gently wilt the arugula. Mmmmm.
Step 4: Serving
 Slice and enjoy! Depending on how thin and crisp you make your crust, the center of the pizza may be a bit droopy – but that’s usually the case with most wheat crusts anyway. Slice and enjoy!
p.s. I’ve yet to experiment to see if the crust would work if it was made with other types of grated veggies. Let me know if you do and what your results are. At the very worst, you’ll end up with a delicious au gratin of something!
[printfriendly]Join my email list and start living healthier!
- Tips & advice on healthier living
- Special promotions & offers
- Sent a few times a month to your inbox

Subscribe today and you'll receive a free e-guide that outlines the four key supplements you need for lifelong health!
