Mashed Sweet Potato ‘Dessert’

This is a yummy mashed sweet potato recipe; so delicious and good for you. It can be used as a side dish or even as a dessert!

What You’ll Need

These amounts make enough for a side-dish for 2 people. Amounts can be adjusted to make more.

  • 1 sweet potato
  • 1 tablespoon coconut oil
  • 1/4 teaspoon cinnamon
  • A sprinkle of natural, unrefined sea salt
  • A handful of shredded, unsweetened coconut
  • Option: some chopped nuts, like pecans

Step 1: Baking

547849_562953957059732_503854590_n[1]Using a fork, poke a bunch of holes into a washed, unpeeled, sweet potato, and then bake in a 350F oven for about 45 minutes (until it’s nice and soft – so it can be easily mashed).


Step 2: Mashing & Serving

547568_562953927059735_1307872019_n[1]Peel away the skin (really easy to do after it’s baked), break it up, and put it in a bowl with coconut oil, cinnamon, and a sprinkle of natural, unrefined sea salt. Mash it all up.

733951_562953937059734_54653351_n[1]Top with shredded, unsweetened coconut (optional, but after all, I am the Crazy Coconut Lady). If I had any pecans, I would have broken some up and sprinkled them on top too. This made my taste buds and my tummy very happy! :o)


Chicken Sate Stir Fry

This meal can be completed in 20 minutes. I got home from work at 6:10 p.m. today and was sitting down to eat this at 6:35 p.m. Quick, easy, and delicious! This recipe makes 2+ servings.

What You’ll Need

  • 2 boneless, skinless chicken cutlets
  • A splash of tamari sauce
  • 1 large clove of garlic, minced
  • 1 teaspoon minced fresh ginger (more or less to taste)
  • 2 tablespoon olive oil
  • 2 tablespoon coconut oil
  • 1 large onion
  • Small head of broccoli
  • Handful of baby carrots
  • 1/4 cup of water
  • Sprinkle of sesame seeds
  • 2 teaspoon organic ‘peanut only’ peanut butter

Step 1: Prep

The only thing I did ahead of time was to pull 2 chicken breasts out of the freezer this morning. The first thing I did when I got home was to slice them up and throw them in a big bowl with a bit of tamari sauce, garlic, and ginger, and stir it all together for a few minutes. Then I took a wok and a skillet and into each one I added 1 TBSP of olive oil and 1 TBSP of coconut oil, then set them over medium heat on the stove.

Step 2: Cooking

299188_558307590857702_964863236_nNext, I cooked the chicken in the skillet, and tossed the veggies around in the wok. Veggies used were one large onion, a small head of broccoli, and a big handful of baby carrots – you can use whatever you like/have on hand. My daughter helped prep the broccoli and suggested we add a splash of sesame oil to the veggies, which was a delicious addition. After tossing the veggies for a few minutes, I added about 1/4 cup of water in the wok, covered it with a lid and turned down the heat, letting the veggies more or less steam for just a few minutes. (I like them crunchy!) Before taking the chicken out of the pan, I added 2 tsp of organic ‘peanuts only’ peanut butter, a splash of tamari, and a few TBSP of water, and stirred until the chicken was coated with a yummy peanutty, sate-type sauce.

Step 3: Serving

547661_558307600857701_814966426_n[1]When everything was ready, I spooned the veggies into a bowl and topped them with the cooked chicken, then sprinkled on some sesame seeds (I like the black ones). This wasn’t what I had in mind when I took the chicken out of the freezer this morning, but as we had to be out the door at 7:00 p.m., I had to come up with a quick Plan B, and a pretty delicious one if I do say so myself! This made 2 servings plus some left over veggies for lunch tomorrow!


Chicken Sausage Meal

This dinner was inspired by pastured chicken sausage and home-made lacto-fermented sauerkraut thanks to Ali and Glenn of Swallowtail Farm, Perth ON! www.swallowtailfarm.ca. This recipe makes 2-3 servings.

What You’ll Need

  • 1 sweet potato
  • 3 mild Italian chicken sausages
  • Big bunch of parsley
  • 4 tablespoon olive oil
  • Water
  • Big bunch of kale
  • 2 cloves of coarsely chopped garlic
  • 1 tomato
  • Optional: lacto-fermented sauerkraut

Step 1: Cooking the sausages and sweet potato

542120_474065945948534_1041840133_n[1]I peeled and cut up the sweet potato and the sausages, chopped up a big bunch of parsley from the garden, put it all in a baking dish, and drizzled about 2 TBSP of olive oil over all of it, then seasoned with salt and pepper.

223077_474065972615198_1139241468_n[1]Tossed it all together until sausages and sweet potatoes were nicely coated with the oil, parsley, and seasoning. Put a little bit of water in the baking dish, then covered it and roasted it in a 350 degree oven for about 35 minutes (until sausage was browned and sweet potatoes were tender). I uncovered it about 1/2 way through. While that was cooking, I prepared the kale.

Step 2: Cooking the kale

387493_474065999281862_697342779_n[1]First, I put the coarsely chopped garlic in a pan with about 2 TBSP of olive oil and about 4 TBSP of water.

198441_474066019281860_554946662_n[2]Then I chopped up a fresh tomato from the garden and mixed it in. Turned the heat to low and just let all the flavours blend for about 5 minutes. Smelled amazing!

248558_474066052615190_488578721_n[1]Chopped up a big bunch of kale and put it on top of the tomato/garlic/olive oil mixture (stray parsley leaf!). Looks like a lot of kale, but it cooks down!

546207_474066075948521_2071438119_n[1]Covered it all up with a lid and put it on medium-low heat for a few minutes. Mixed it all up and covered it again for a few more minutes, until kale was tender. Make sure you don’t run out of water! Add a bit more if you need to.

Step 3: Serving

429296_474066119281850_731849173_n[1]Dinner is served, with a few heaping tablespoons of lacto-fermented sauerkraut (loaded with healthy probiotics – a great digestive aid). If you’re ever in the Perth area, make sure you stop by Swallowtail Farm. Free range eggs, pastured poultry, seasonal fruit and veggies, lacto-fermented sauerkraut, jams, jellies, beautiful pottery, and lots more. So thrilled to have discovered this wonderful farm! www.SwallowtailFarm.ca


Tomato and Basil Soup

I love the combination of tomatoes and basil. Today, I enjoyed this combo as a soup. Mmmmm! This recipe made approximately 8 cups of soup. I grow lots of tomatoes in my vegetable garden so that I can freeze them and have them on hand all winter long to make delicious soups like this one, as well as adding them to other dishes.

What You’ll Need

  • 4-5 big, ripe tomatoes
  • 2-3 average sized carrots
  • 2 medium onions
  • 2-3 cloves of garlic
  • 4 cups of chicken broth
  • A small bunch of fresh basil
  • 1 teaspoon sea salt
  • Toasted pine nuts
  • 2 tablespoons of olive oil

Step 1: Prep

IMG_1939Slice the carrots, coarsely dice the onion, mince the garlic and set aside. Wash the tomatoes ,coarsely chop them up, and set them aside (separate from the veggies you just prepped). You should end up with about 4 cups of chopped up tomatoes. Some of my tomatoes were pretty watery, so I gently squeezed some of the watery-seed-gel out while I was cutting them up.

Step 2: Cooking

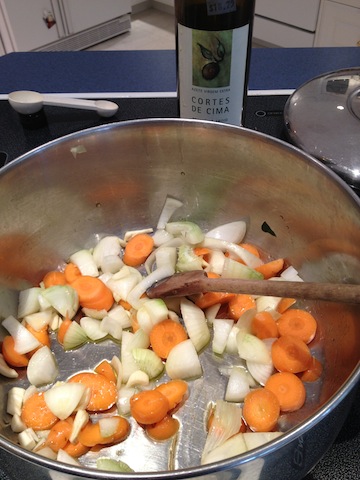
IMG_1941Add 2 TBSP of olive oil to a large saucepan, then add the sliced carrots, coarsely diced onion, and chopped up garlic. Sautee ingredients over medium heat for about 10 minutes, or until onions just start to brown.

IMG_1947…Thought you would enjoy this cute little round carrot that got left behind….OK….next step….

Step 3: Cooking

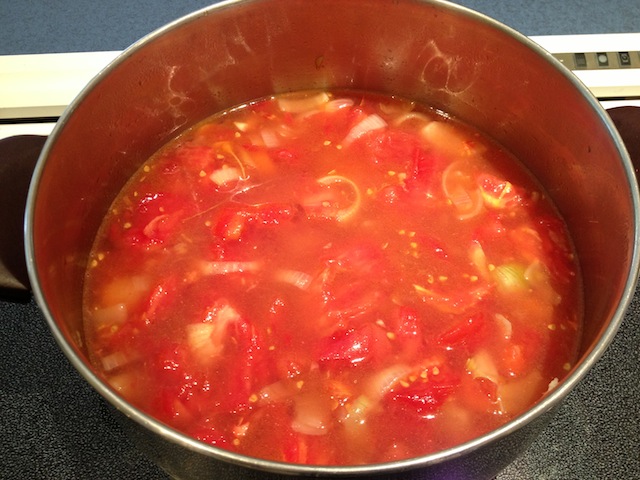
IMG_1946Add the tomatoes to the pot with the onions, carrots, and garlic. Add 4 cups of organic chicken stock and 1 tsp of unrefined sea salt. Stir it all together and bring to a boil, then reduce heat and simmer with the lid on for 10 to 15 minutes.

IMG_1957Turn off the heat, take the pot off the heat, and stir in a handful of basil…or more or less, depending on your love of basil. If you don’t like basil (gasp!) you can omit this step. Put the lid back on and let the soup sit for 10 or 15 minutes to infuse the basil flavour into the soup and to let it cool a bit before putting it into the blender. Once the soup has cooled off enough to be blender-friendly, pour into a blender and puree until completely smooth and creamy.

Step 4: Serving

IMG_1965Return the soup to the pot and warm up to the desired temperature for serving. Note that this soup will freeze beautifully if you don’t finish it all! To serve, I topped the soup with more basil (some fresh leaves cut into thin strips and some whole ones) and toasted pine nuts. A bit of a pesto-inspired topping. Be creative with your toppings. I bet it would taste great topped with fresh chives and goat cheese! If you try this recipe, let me know how you liked it…and what you used as ‘sprinkles’!


Frittata with Swiss chard, onions, mushrooms, and goat cheese

This is a great meal for breakfast, lunch, or dinner! I love Swiss chard and always have lots of it in my garden. Here’s the latest way I cooked it up.

What You’ll Need

  • 1 bunch Swiss chard
  • 2 tablespoon of olive oil
  • 2 tablespoon of butter
  • 1 medium sized onion
  • A cup or so of a variety of chopped mushrooms
  • 4-5 eggs
  • Handful of goat cheese

Step 1: Prep

1237018_629234927098301_2015535296_nFirst I quick boiled the Swiss chard in a large pot for just 2 or 3 minutes (this neutralizes its oxalic acid content). Then I drained it, squeezed all the excess water out (wait until it cools a bit to do this!), and chopped it up into bite-sized pieces. (oops! just realized this is a picture of me cooking Swiss chard mixed with beet greens…but the principle is the same!)

Step 2: Cooking

IMG_1977Melt a couple of TBSP of olive oil and a couple of TBSP of butter in a pan (one that you’ll be able to put in the oven). Chop up a medium sized onion and a variety of mushrooms (shitake and enoki are great!) and sautee in the pan until they are soft and a bit golden. Then stir in the Swiss chard. Mix it all up and season with unrefined sea salt.

IMG_1978Beat 4 or 5 eggs in a bowl, then pour them evenly over the mixture in the pan. Tilt the pan around to allow the egg to be evenly distributed, and poke some holes through the Swiss chard with a wooden spoon to allow some of the egg to sink down to the bottom of the pan. Once most of the egg is cooked, drop some blobs of soft, unripened goat cheese all over the top.

Step 3: Serving

IMG_1979Place the pan in the oven and broil just for a few minutes until the egg finishes cooking and the cheese gets melty and golden. Remove from oven (use an oven mitt!!!) and enjoy! To serve, I sprinkled it with turmeric and added a side salad of fresh tomatoes and basil tossed in olive oil. Delicious!


Kabocha Squash Oishii-ness

Oishii desu ne! Squash and pumpkin are my favourite ‘warm-and-fuzzy’ foods. They are excellent for the health of our digestive system, and promote regular bowel movements. In fact, putting a tablespoon or so of plain, cooked or mashed pumpkin (or squash) into a cat or dog’s food is a great way to keep them regular too!

kabocha

My brother grew kabocha squash in his garden this year, and I was the lucky recipient of some…as well as this great recipe. Kabocha squash are often used in vegetable tempura. The skin is thin, so you can leave it on and eat it.


What You’ll Need

  • 1/2 kabocha squash
  • 3/4 cups of water
  • 2 tablespoon of soy sauce (organic and gluten-free)
  • 1/2 tablespoon of mirin
  • 1 tablespoon of maple syrup
  • 4 tablespoon of sesame seeds

Step 1: Prep

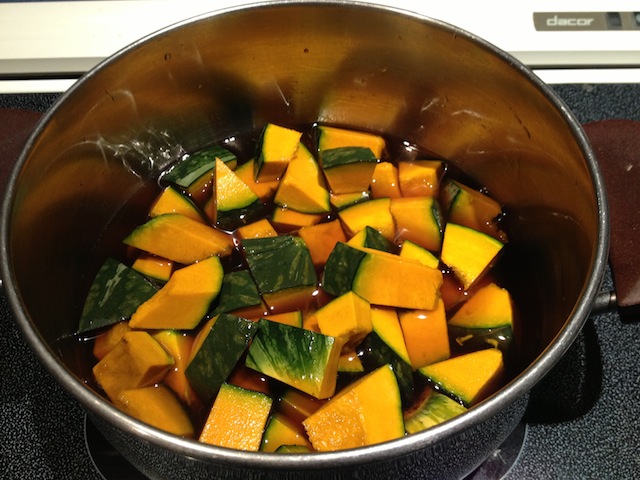
photo 1I cut the squash in half, spooned the seeds out, used one half for this recipe and stored the other half in the fridge for next time. Then I cut up half the squash into bite-sized pieces and added just over 2 cups of it to a pot along with the water, soy sauce, mirin, and maple syrup. Mirin is a popular condiment in Japanese cooking. It is often described as a cross between rice wine and sake.

Step 2: Cooking

photo 2Stir everything together, bring to a boil, and then simmer on low heat, with the lid off, until the squash is thoroughly cooked (about 10 minutes or so – it should be soft and easy to pierce with a fork). There should barely be any water left in the pot at this point. Take it off the heat. Toast about 4 TBSP of sesame seeds (you can do this while the squash is cooking). I toasted mine by putting them in a 350F oven for about 10 minutes. Stir them around/shake them around 1/2 way through to make sure they evenly toast. Keep an eye on them and take them out when they are golden. They can go from golden to burnt pretty quick! Once they’re toasted, coarsely grind them. I put mine in an electric grinder. You could also put them in a plastic bag and pound them with a rolling pin…use your imagination to coarsely grind them!

Step 3: Serving

Pour the ground sesame seeds into the pot with the cooked squash, stir it up so that the squash gets coated with the sesame seeds and enjoy! Oishii desu ne? (Google it!)


Fresh Tomato, Basil and Garlic Buckwheat Pasta

It took me about 10 minutes to make this yummy pasta dish for dinner tonight. I was on my own, so wanted something quick and easy. My inspiration was some freshly picked tomatoes and basil from my garden.

What You’ll Need

The amounts listed are for one serving. Adjust as necessary.

  • Soba (buckwheat) pasta noodles – about 3 oz dry
  • Cut up fresh, ripe tomatoes (about 1/2 – 1 cup)
  • 5 or 6 leaves of fresh basil, finely chopped (more or less to taste)
  • 2 tablespoon extra virgin olive oil
  • 1 small clove of garlic (minced)
  • Pinch of sea salt
  • Optional: Parmesan or goat cheese

Step 1: Cooking

309237_462751593746636_1029532581_n[1]First, I put a pot of water to boil on the stove for the pasta. Then, I chopped up all the tomatoes and basil and tossed in the extra virgin olive oil, garlic (you can use more or less garlic to suit your taste – one small clove made it pretty potent for me), and a good pinch of unrefined sea salt. Then I let it sit while I cooked the pasta.

Step 2: Serving

303555_462751680413294_358450578_n[1]I used soba noodles tonight. They’re made of buckwheat, which is gluten-free, and they cook really fast – in about 5 or 6 minutes. Strain the pasta and toss with the tomato mixture. I grated some Parmesan cheese on mine! I’m sure goat cheese would taste good with it too. Enjoy!


Privacy Policy

Website Maintenance and Services by Andrew Wardell