
As a nutritionist, I promote getting as many of the nutrients our body needs by eating healthy, whole, unprocessed foods. I recommend buying organic produce when possible (especially if the fruits and vegetables you eat the most are ones that have high pesticide residues), buying grass-fed/pastured animal products, avoiding/limiting sugar/anything that has sugar in it/anything that gets easily broken down into sugar (e.g. starchy low fibre foods – think ‘white’ foods), and avoiding genetically modified crops (e.g. soy, canola, corn, sugar beets) and products made with them.
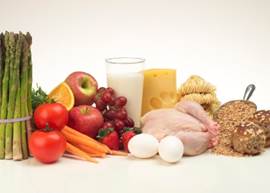
I also recommend that we eat fat – healthy fat. If Mother Nature put fat in a food, then we shouldn’t be afraid of it … as long as that fat-containing food hasn’t been processed, or refined, or homogenized, or interesterified, or …. you get the picture!
Unfortunately, there is a lot of confusion surrounding the topic of fats, which leads to many of us eating too many of the wrong kinds of fats, and not enough of the right ones. This can lead to some pretty serious health consequences.
One type of fat that most people don’t get enough of, even if they think they are eating well, is omega-3 fatty acids. In fact, numerous reports indicate that at least 40% of Canadians are not getting enough omega-3s in their meals and snacks. This is a big deal because an omega-3 deficiency is commonly associated with an increased risk of heart disease (the number 1 killer in Canada). Note that a deficiency in omega-3s sets the stage for inflammation in the body, which is a key factor in heart disease and virtually any health issue you can think of, including:
- an increased risk of cancer
- osteoarthritis
- increased levels of LDL damaging cholesterol
- immune system dysfunction
- hormone imbalances
- compromised cognitive/brain health
- reproductive and digestive disorders
While you can get omega-3s from foods such as cold-water fatty fish (think “SMASH” = salmon, mackerel, anchovies, sardines, herring), flax seeds, chia seeds, and walnuts (note that fish sources are more bioavailable/potent), many of us would benefit from taking an omega-3 supplement.
 I take an omega-3 supplement every day in the form of krill oil. The brand I take and recommend is CanPrev Krill Oil. Each 500 mg softgel contains:
- Naturally occuring astaxanthin – one of the most powerful antioxidants
- EPA & DHA – two omega-3 fatty acids that can help boost concentration, maintain healthy cholesterol levels, and so much more
- Phospholipids – long known as one of the ‘building blocks of life’, phospholipids support healthy cellular and body function (they are not found in fish oil). Phospholipids increase absorption by up to 68% when compared to other marine-based omega-3s.
With all of the great health benefits being linked to krill oil, it’s not surprising that a lot of krill oil products are appearing on the market; however, I’m putting out a big Buyer Beware that not all of them are created equal. CanPrev Krill Oil:
- is sourced from 100% traceable and sustainable pure, eco-harvested Antarctic krill
- is 100% pure with no toxins or contaminants
- has no fishy aftertaste reflux/burping
- comes in small, easy-to-swallow softgels
You can order CanPrev Krill Oil through Perfect Resonance Natural Health Counselling in two sizes (pricing as of July 2025 – subject to change):
- 60 x 500mg softgels ($40 + HST)
- 120 x 500mg softgels ($75 + HST)
At a general dose of one 500 mg softgel daily (dose may very depending on individual circumstances), this product provides an economical supply of concentrated anti-inflammatory power.
To order, please email info@perfectresonance.com and put ‘Krill Oil’ in the subject line. You will receive a confirmation email with payment instructions when your order is ready for pick up through Perfect Resonance Natural Health Counselling (Maitland & Carling area, Ottawa ON).
As always, whenever you start taking a new supplement, it’s important to let your doctor and/or other health care practitioners know, especially if you are on any medications.
Take control of what you can!


 Frozen fruits and vegetables are typically picked at peak ripeness — when they’re the most nutrient-dense — and then flash-frozen within hours. This process locks in vitamins, minerals, and antioxidants. In contrast, “fresh” produce is often picked before it’s ripe, travels long distances, and can spend days (or weeks) in transit and on grocery store shelves. During this time, nutrient levels, particularly vitamin C and B vitamins, can degrade significantly. Some studies show that produce can lose up to 55% of its vitamin C content within a week … and some vegetables, like spinach for example, can loose up to 90% of their vitamin C content within a day of being harvested. For this reason, in many cases, frozen produce can be more nutritious than fresh produce that isn’t local or in season.
 Many frozen fruits and vegetables come pre-washed, pre-peeled, and pre-chopped. This means significantly less prep time when you’re making meals. For busy individuals or families, this can be a game-changer. Stir-fried or steamed frozen veggies are a quick addition to any meal, and frozen fruits are an easy and delicious addition to yogurt or smoothies. Keeping a bag of mixed vegetables and a bag of mixed berries on hand means you’re always just a few minutes away from adding a nutrition boost to any meal — no knives, peelers, or cutting boards required.
 This delicious recipe is great for breakfast, lunch or dinner. You will not believe how good this wheat-free crust is! It freezes beautifully either whole or in individual slices, which would make it a great ‘grab-and-go’ meal. My recipe is adapted from a ‘Heal Thyself’ recipe.
 It will be fiddlehead season soon! They are delicious and packed with vitamins, minerals (especially iron), and antioxidants. I have had enjoyed them steamed and then tossed in butter and salt, sauteed in garlic and olive oil, pickled, in tempura, and so many other ways. If I had to pick a veggie that they most resemble in terms of taste and texture, I’d say asparagus … sort of! Anyway, one of my favourite ways to enjoy fiddleheads is in this delicious soup.
 This recipe incorporates two of the most nutrient-packed veggies into one delicious casserole! Kale and sweet potatoes are loaded with fibre and nutrients that offer numerous health benefits, including modulating our immune and inflammatory responses, which are critical to overall health. This recipe serves 6-8 as a side dish and can be prepared a day or two in advance. Enjoy!
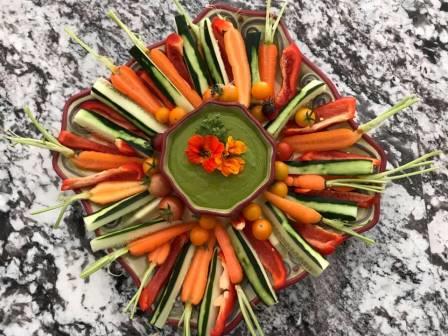
 If you like cilantro, you’ll love this dressing/dip that can be used in so many ways. The recipe makes a very generous cup, and it keeps well in the fridge for up to a week. By the way, cilantro isn’t just delicious – it also delivers significant health-boosting actions. Cilantro is touted as having potent anti-inflammatory and antimicrobial properties. It also has significant chelating properties, which means it can bind to heavy metals that can then be eliminated through the body’s regular excretory channels. Cilantro is often used in heavy metal detox protocols and has been cited to have a particularly strong affinity for mercury.
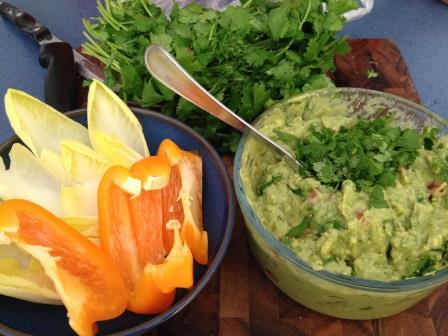
 Avocados offer some pretty amazing health benefits. They’re loaded with antioxidants, as well as healthy fats that promote heart health and fight inflammation. Guacamole is a delicious way to enjoy all the health benefits of avocados. This recipe is quick and easy…and includes a tip for preventing your left over guacamole from turning brown!
 I especially love this recipe when I have zucchini coming out of my ears from my veggie garden. You can use whatever veggies and other ingredients you like for the stuffing – no need to stick to what I’ve used. Just make sure you use something that will hold the filling together. I used an egg and cheese. You can freeze these once they’re stuffed/before you bake them.
 Quick, delicious, refreshing and nutritious! Really! If you’re looking for something quick and refreshing, this green smoothie will hit the spot. Sometimes I make individual frozen packets of the ingredients so they are ready to go!
 Everyone LOVES this dressing, so I guess it’s not just ‘my’ favourite! It will last a good week or so in the fridge (you can also freeze it), so feel free to double or triple the recipe. I typically use it on green salads, but it is also delicious drizzled on cooked veggies.
 I love basil … and all the other ingredients that go into making this delicious pesto. I particularly love making this recipe when my garden is overflowing with basil. Most people use pesto as a pasta ‘sauce’; however, it’s also great on fish, chicken, and veggies, and it’s a yummy addition to wraps, salad dressings, and dip. This recipe is easy and so delicious and can be doubled, tripled, quadruples …. you get the picture. It freezes beautifully in lined ice cube or muffin trays.
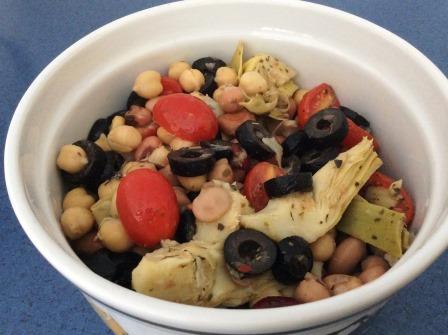
 This broccoli salad is packed with nutrient-dense foods and makes a great side at any time of year. Use pomegranate seeds, diced red bell pepper, or dried cranberries instead of (or in addition to) the raisins for a festive look! Enjoy!


