Bread Battles: Sourdough vs Sprouted Grain

I don’t often eat bread, but when I do, I strive to make the best choice possible when it comes to nutrition and health.

In the world of nutrition, there seems to be an ongoing debate about whether bread should be eaten at all, and if it is, the debate turns to whether there’s a type of bread that’s best for our health. Among the contenders, sourdough and sprouted grain breads often steal the spotlight, boasting unique flavors and purported health benefits. Why are these two bread varieties gaining so much attention, and how do they stack up against ‘regular’ wheat bread? Keep reading to find out – and watch the video at the end of this post so you never end up wasting money throwing out a single slice of stale or mouldy bread!

The Rise (pardon the pun!) of Sourdough and Sprouted Grain Breads

Sourdough and sprouted grain breads have been a staple for centuries, cherished for their distinct flavours and textures; however, the appeal goes beyond taste. When traditionally prepared, these breads offer a range of health benefits, compared to ‘regular’ wheat bread, including:  

  1. Gut-Friendly: Sourdough is made through a natural fermentation process, where wild yeast and bacteria break down various anti-nutrients and/or hard to digest nutrients. This not only enhances the bread’s flavor but also makes it easier to digest, promoting gut health. The same can be said for the grain sprouting process.
  2. Blood Sugar Balance: The fermentation and sprouting processes lower the bread’s glycemic index, leading to slower absorption of sugars into the bloodstream. This can help stabilize blood sugar levels, making it a better option for those watching their blood sugar.
  3. Improved Nutrient Absorption: The fermentation and sprouting of grains reduce their anti-nutrient content, making minerals such as calcium, iron, and magnesium more available for absorption. The processes also break down starches and proteins, making other essential nutrients, including amino acids, more bioavailable. This means you get more nutritional bang for your buck with each slice.
  4. Potential Gluten Tolerance: Research is still on-going on this potential benefit; however, there is some evidence that some individuals with gluten sensitivities find they can tolerate sourdough and sprouted grain breads better than conventional wheat breads. Please note that unless a sourdough or sprouted grain bread is labeled as gluten-free, individuals with Celiac disease or any other allergy or health condition related to wheat/gluten should completely avoid them.

Buyer Beware

Not all sourdough and sprouted grain breads are created equal and many large bread manufacturers are jumping on the band wagon labelling their breads as ‘sourdough bread’ or ‘sprouted grain bread’ when they are far from the healthy, traditional forms of these breads.

Many breads labelled as ‘sourdough’ are not made using traditional methods, which among other things, involve being solely fermented and leavened using wild cultures, AND ensuring the dough is fermented properly (re: timing and pH monitoring) to deliver the nutritional benefits of traditional sourdough bread. The source of the fermenting microorganism used is key. If you want to read a very ‘sciency’ article about sourdough bread, click here … and/or keep reading this blog for some slightly more practical advice. :)

As always, it’s important to READ LABELS. The only ingredients that should be on the label of a naturally fermented/leavened sourdough bread are:

  • Flour
  • Water
  • Salt
  • Culture or starter (e.g. wild yeast and bacteria)

Similarly, not all breads labelled ‘sprouted grains bread’ are necessarily as healthy as you may think thanks to food manufacturing labelling ‘guidelines’. For example, currently, a grain product can carry a ‘whole grain’ claim if at least 30% of the product’s ingredients (by weight) are whole grain and the product contains more whole grain ingredients (by weight) than refined grain ingredients. So, as a silly example (or maybe not so silly as some food manufacturer’s can be very sneaky!), the ingredients of a grain product touting a ‘whole grain’ claim could be 30% whole grains, 29% refined grains, and 41% of combined other ingredients such as sugar, unhealthy oils, additives/preservatives, etc. That doesn’t sound very healthy! I have yet to come across a definition for a grain product to carry a ‘sprouted grain’, claim; however, I’ve seen some big bread manufacturers come out with breads touting a ‘sprouted grain’ claim, and when I read the ingredient label, sprouted grains don’t stack up very well compared to other ingredients. Remember that ingredients are listed in order of weight, so check to see where ‘sprouted grains’ appear on the ingredient label of the product you are thinking of buying.

My go to sprouted grain breads are made by Food for Life.  Food for Life offers numerous products, inluding Sprouted for Life Bread, a gluten-free bread made from sprouted grains such as quinoa, millet and chia. These bread products are found in the freezer section of most health food stores and/or the health food section of larger grocery store chains. 

Moderation Matters

While sourdough and sprouted grain breads may offer certain health benefits over regular bread, that doesn’t mean you should start chowing down on them! Moderation is key for several reasons, including:

  1. Carbohydrate Load: While sourdough and sprouted grain breads have a lower glycemic index compared to refined wheat bread, they still contain carbohydrates. Monitoring your carbohydrate intake is important, especially if you are trying to control your weight or manage conditions like diabetes.
  2. Dietary Balance: While bread can be a nutritious part of your diet, it shouldn’t overshadow other essential food groups. Aim for a balanced diet rich in vegetables, along with some fruits, some proteins, and some healthy fats alongside your occasional sprouted grain, sourdough, or other bread/grain choices.

When I make or buy loaves of sourdough or sprouted grain bread, I only eat a slice occasionally. The video at the end of this post shows what I do to ensure that not a single precious slice goes to waste – which is particularly important when I’m buying these breads as they are pricier than regular commercial wheat breads.

In conclusion, both sourdough and sprouted grain bread offer unique flavors and health benefits that set them apart from traditional wheat bread. However, like all foods, they should be enjoyed in moderation as part of a balanced diet. By occasionally incorporating these wholesome bread varieties, you can savour their goodness while supporting your overall health and well-being.

Nourish Your Brain: 10 Foods for Optimal Cognitive Health

Sadly, almost half a million people in Canada live with dementia, which impacts not only their own lives, but also the lives of their loved ones and caregivers. It is estimated that this number will double by 2030. While the risk of dementia increases with age, it is not an inevitable part of aging, even if it ‘runs in the family’; in fact, some studies suggest that a healthy diet, such as the Mediterranean Diet, can reduce genetic risk by 25%.

Our brains are powerful organs that require proper nourishment to function at their best. Just as our bodies need the right nutrients for physical well-being, our brains benefit from a diet rich in foods that support cognitive health. In this blog, we’ll explore 10 foods that contribute to optimal brain function.

1 – Cold-Water Fatty Fish

Cold-water fatty fish such as salmon (wild is best!) are rich in omega-3 fatty acids, particularly DHA & EPA. These essential fatty acids play a crucial role in building and maintaining the structure of brain cells, supporting optimal communication between nerve cells, and reducing inflammation. Salmon isn’t your only option! Remember the acronym SMASH when looking for cold-water fatty fish. SMASH = Salmon, Mackerel, Anchovies, Sardines, Herring.

2 – Blueberries

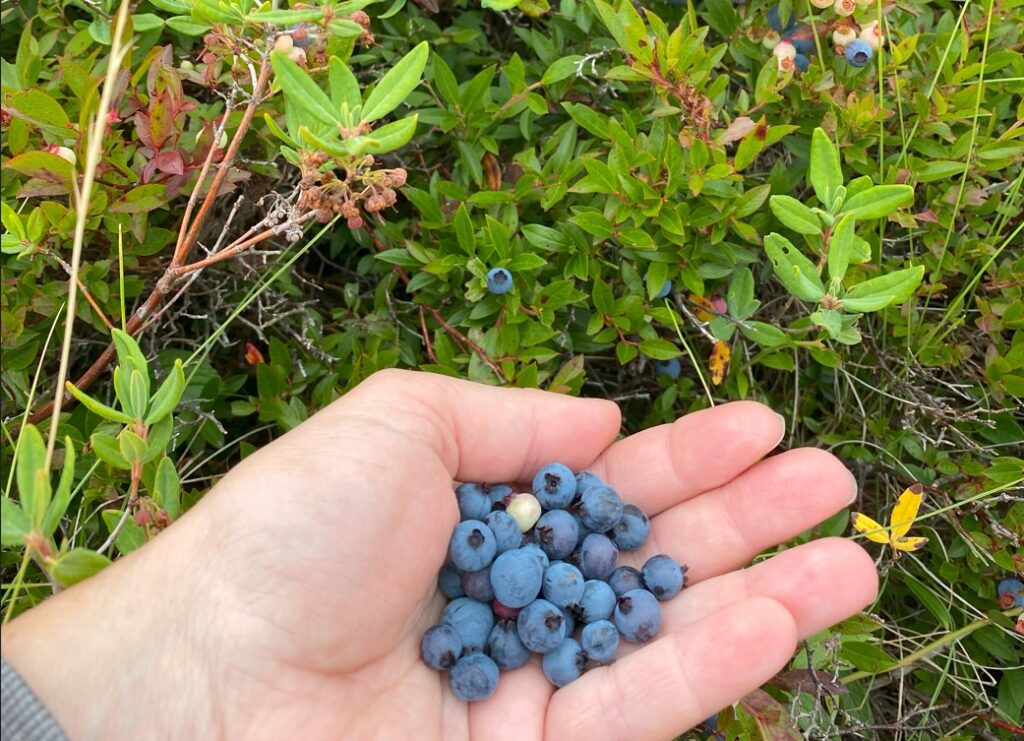
Blueberries are one of the highest antioxidant-rich foods you can eat – especially wild blueberries like the ones in the photo that I picked in Newfoundland last summer :)  Blueberries are a great source of gallic acid – an antioxidant that has been shown to support neuropsychological health by protecting the brain from oxidative stress. 

3 – Broccoli

Broccoli is a nutritional powerhouse, containing high levels of antioxidants, vitamin K, and choline. Vitamin K is essential for forming sphingolipids, a type of fat densely packed into brain cells, contributing to overall cognitive health. Choline is an important brain-health boosting nutrient. Broccoli is a cruciferous veggie – a class of veggies associated with brain health. Cauliflower, Brussels sprouts,  cabbage, kale and many other types of dark leafy greens, are also part of the cruciferous veggie family. 

4 – Pumpkin Seeds

Pumpkin seeds/pepitas are a good source of several brain-boosting minerals. Magnesium plays a crucial role in learning and memory, while iron helps deliver oxygen to the brain. Zinc and copper are essential for nerve signaling.

5 – Dark Chocolate

Dark chocolate, in moderation, can be a treat that offers cognitive benefits. Cocoa is rich in flavonoids, which have antioxidant and anti-inflammatory properties. Studies have shown that cocoa can enhance memory and improve mood by increasing blood flow to the brain. The darker the chocolate (at least 70% cocoa) the better – and some brands are healthier than others

6 – Eggs

Eggs, specifically egg yolks, are an excellent source of choline – a nutrient that is a precursor to the neurotransmitter acetylcholine, which is crucial for mood and memory regulation. Choline deficiency has been linked to neurological disorders, making eggs a valuable addition to a brain-healthy diet. To get the most benefit from the choline in eggs, leave the yolks runny/soft. Eggs are one of Mother Nature’s  most perfect foods, so enjoy the whole egg – yolk and egg whites … and don’t worry about the cholesterol. Cholesterol is a vital nutrient for brain health (and virtually every cell in the body!), and studies show that eating eggs typically has no effect on cholesterol levels of healthy folks and might even help to support good cholesterol levels. Whenever possible, buy free range/pastured eggs.

7 – Nuts

Nuts, particularly walnuts (ever notice they look like a brain?), are rich in DHA, a type of omega-3 fatty acid. Additionally, they contain antioxidants, vitamin E, and folate, contributing to overall cognitive function and protection against age-related cognitive decline. Choose raw and unsalted nuts, and practice variety and moderation.

8 – Beets

In addition to being a good source of nutrients with anti-inflammatory and antioxidant powers, beets also contain natural nitrates. Nitrates are vasodilators, which means they dilate (or open up) blood vessels, including those that supply the brain. This leads to improved blood flow, which means increased delivery of nutrients and oxygen to the brain.

9 – Avocados

Avocados are rich in monounsaturated fats, which contribute to healthy blood flow, a critical aspect of cognitive function. They also contain potassium, vitamin K, and folate, all essential for brain health and neurotransmitter function.

10 – Herbs and Spices

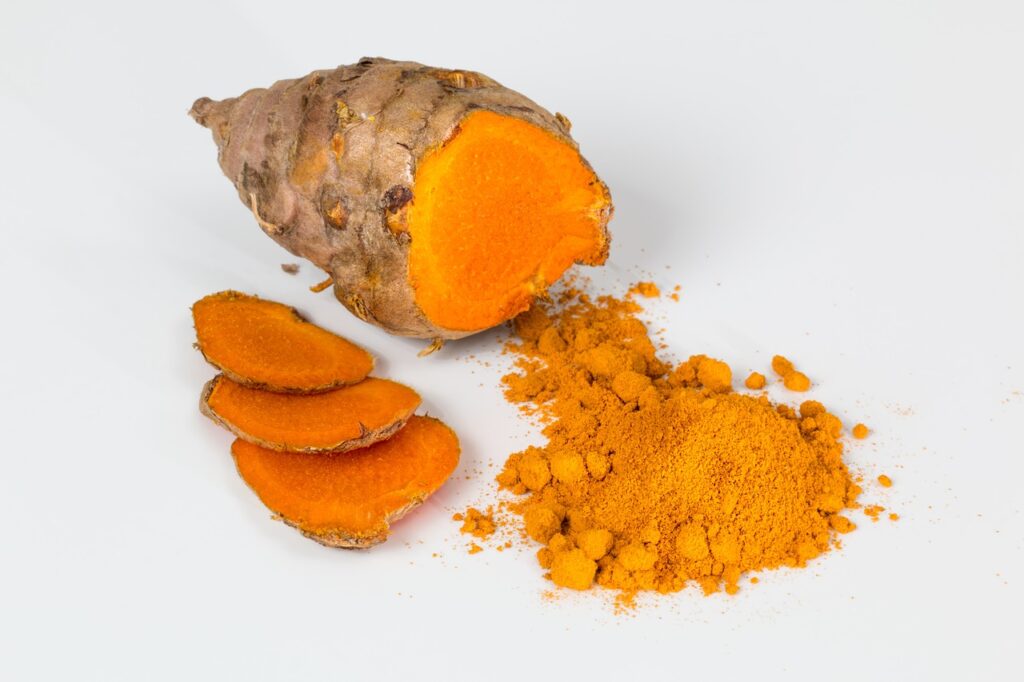
Many herbs and spices support brain health. Rosemary and turmeric are often cited as protecting the brain from neurodegeneration thanks to their strong antioxidant and anti-inflammatory powers.

Closing Thoughts

Always remember VARIETY and MODERATION when it comes to foods. Variety in the foods we eat translates into variety in the nutrients we absorb that are potentially critical to supporting cognitive health. Including these 10 brain-boosting foods in your regular meals and snacks can contribute to better memory, improved concentration, and long-term brain health. Note that maintaining a healthy lifestyle that includes regular exercise, proper hydration, and sufficient sleep complements the positive impact of these brain-nourishing foods. OH! And one more thing! There’s a very strong connection between gut health and brain/mental/cognitive health, so anything that supports gut health is good for the brain! Think probiotic supplements and properly fermented foods and drinks, such as whole fat, plain, organic yogurt and kefir, sauerkraut, and kombucha.

Take control of what you can!

Holiday (or any day!) Yummy Chocolate Bark

This chocolate bark is SO easy to make! The dark chocolate base is a good source of magnesium (the anti-stress mineral) as well as various health-boosting flavonoids and antioxidants that have been linked to numerous  health benefits including protection from disease-causing free radicals and supporting cardiovascular and cognitive health.

The healthy goodness of the bark’s chocolate base is boosted by topping it with nutrition-packed sprinkles including raw nuts and seeds, dried unsweetened coconut, and dried fruits and berries!

This recipe will result in an 11 inch x 17 inch baking sheet/pan of bark that you will then break up into pieces. You can adjust the amounts of ingredients if you want to make more or less … although I can’t imagine why you’d want less!

It took me less than 30 minutes to make this bark (not including the setting time) and I did it without tempering the chocolate. I suppose if you want to feel like a chocolatier, you can temper the chocolate. The risk of not tempering chocolate is that it may not be shiny and it won’t snap. I have never tempered chocolate and have always had good results. Maybe I’m just lucky! :)

What You’ll Need

  • An 11 x 17 inch baking pan covered with a sheet of wax paper
  • A spatula
  • A glass or stainless steel bowl that is big enough to hold 4 cups of chocolate chips and that will also comfortably sit on top of a sauce pan (see Step 1 photos)
  • 4 cups of dark or semi-sweet chocolate chips. Note that even though semi-sweet chocolate is a form of dark chocolate, it will contain more sugar compared with dark chocolate.
  • 1 TBSP of coconut oil
  • 1/2 tsp of cinnamon (you could use more)
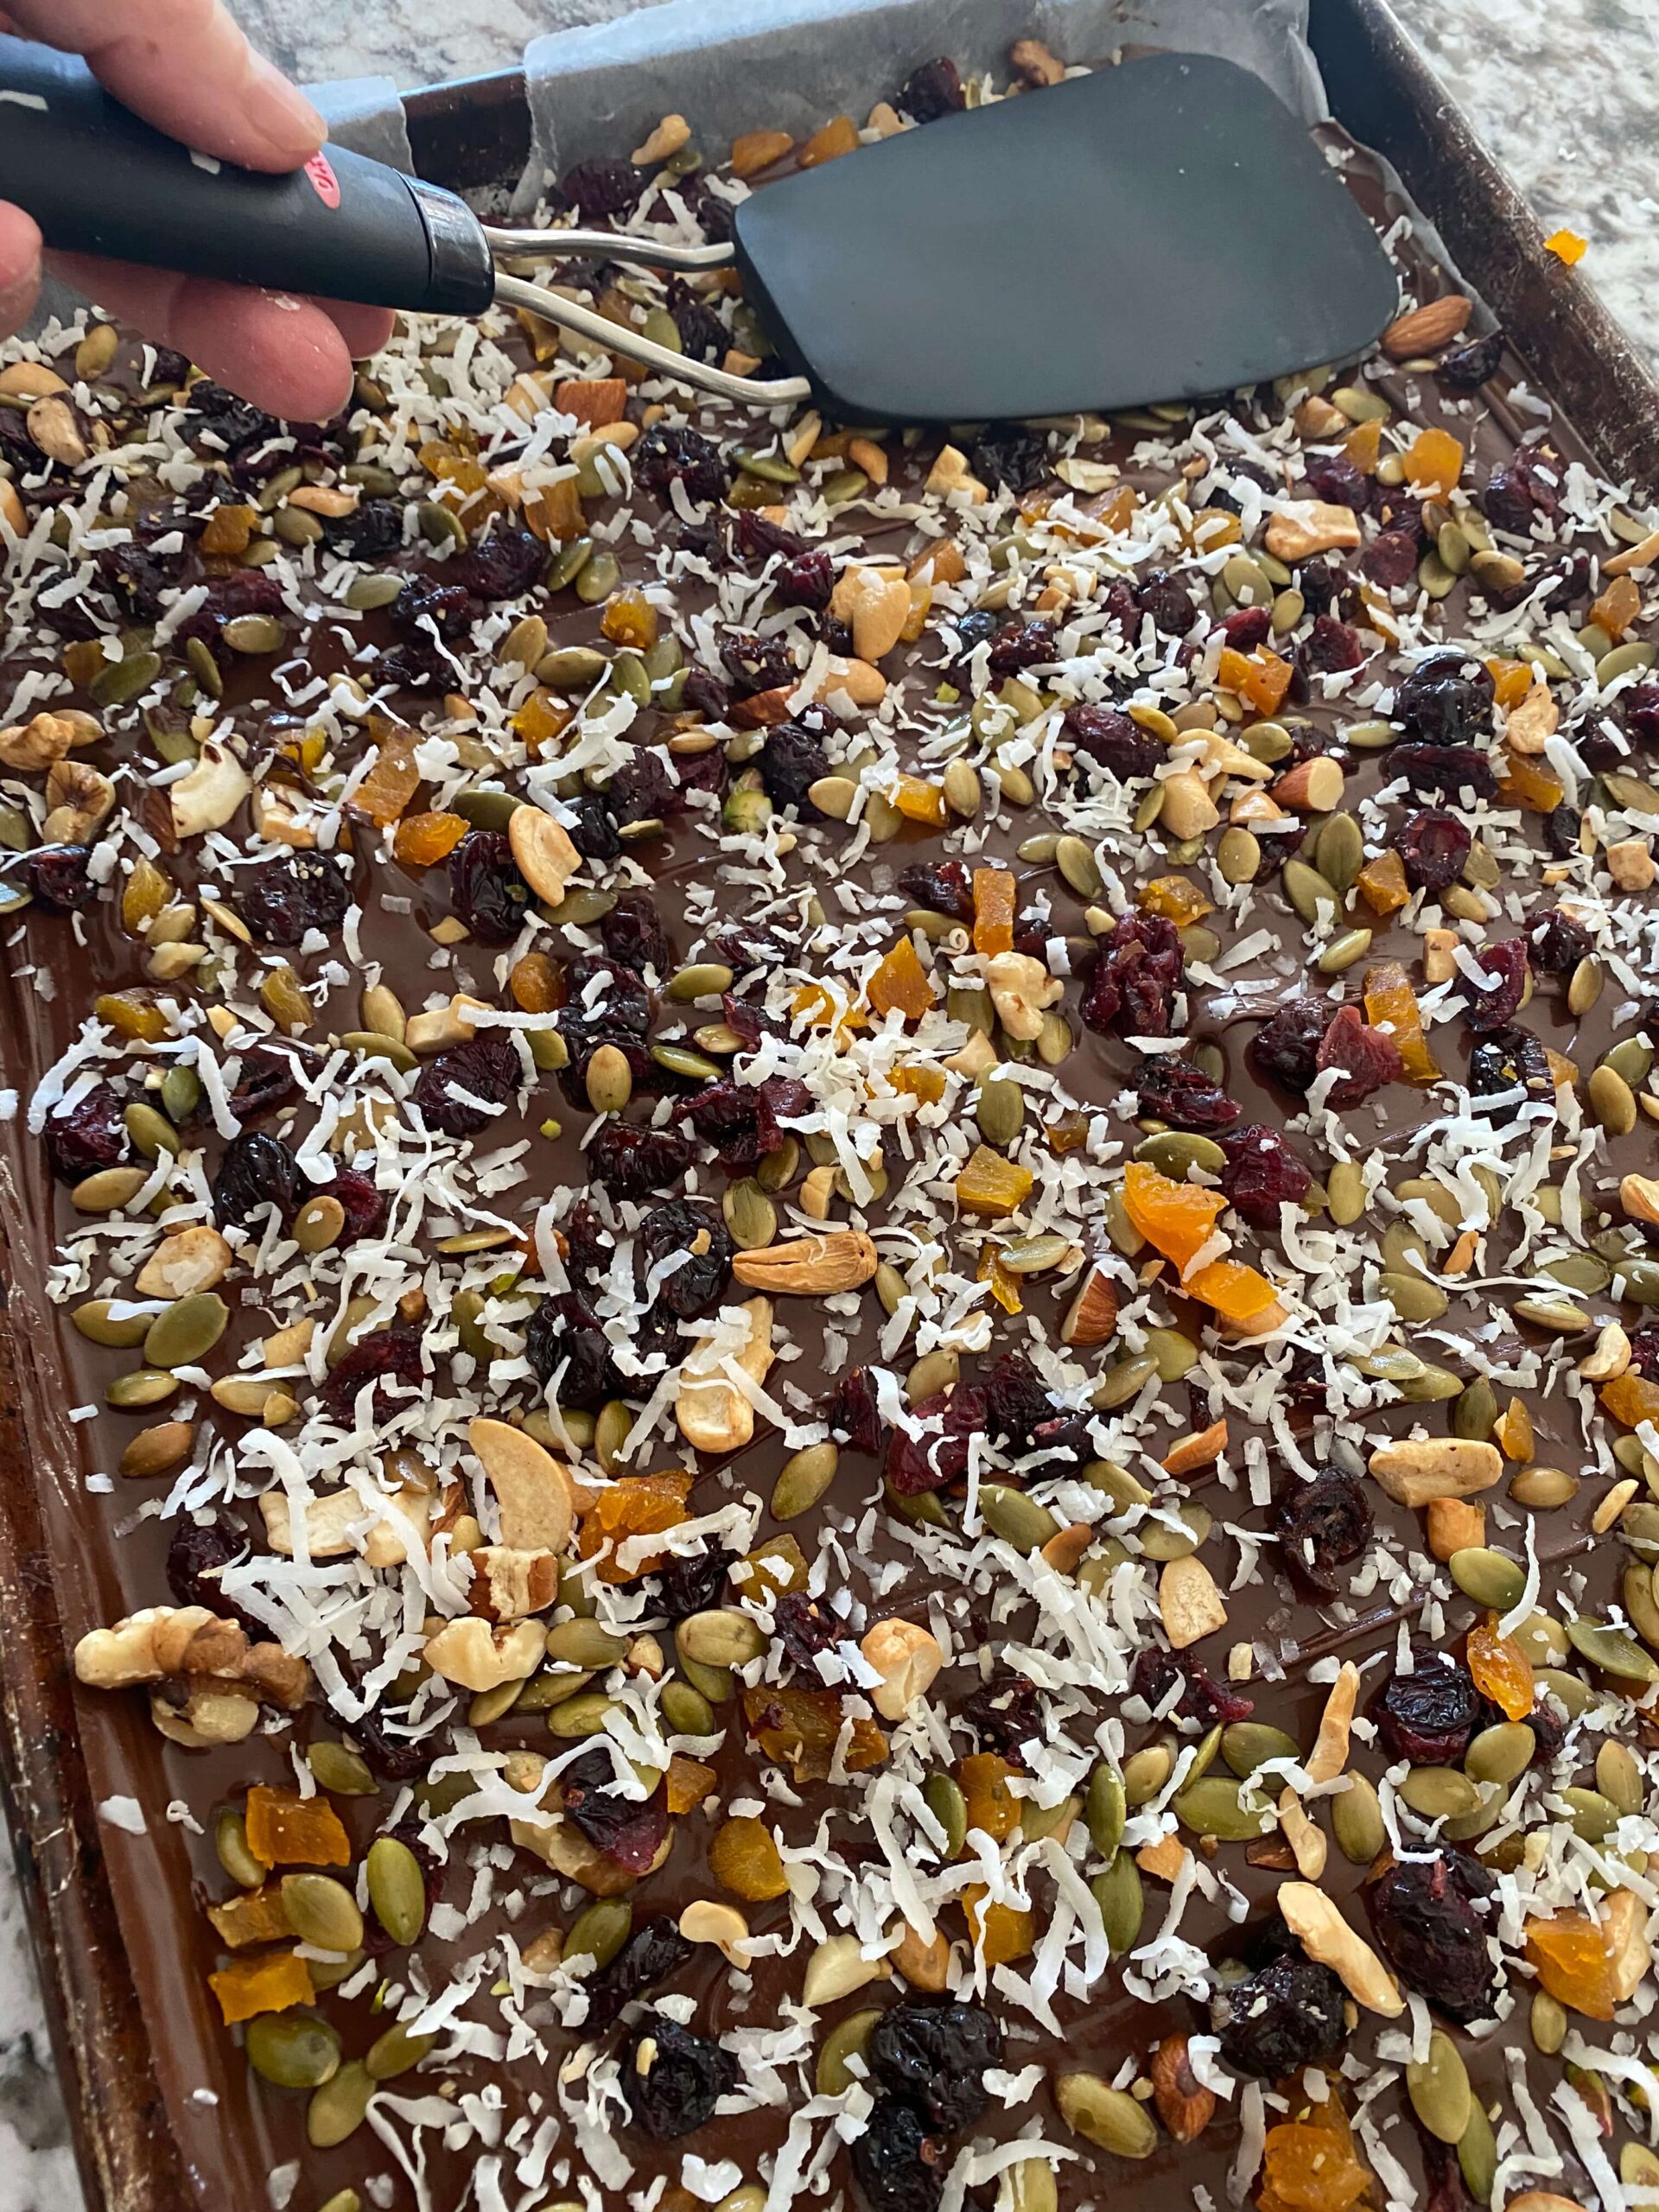
  • 1 to 1.5 cups of mixed toppings. I used 1.5 cups and suggest you prepare that much too and when it comes time to sprinkle them on your chocolate base, you can decide if you want to use them all or not. I suggest you have more toppings than less ready to go as it’s easier to decide not to use all of the toppings once you get to the topping stage than it is to realize you need more. Any leftover toppings make a great addition to plain yogurt or a salad. Have all these toppings prepared BEFORE you start melting the chocolate, so they are ready to go as soon as you pour the melted chocolate onto the baking sheet. The sooner you get the toppings onto the melted chocolate, the better they will stick to it. You can get creative here, while still keeping your health-conscious hat on! You can use whatever combination and proportion of ingredients you like for the toppings. This time around, I used what I had on hand which included equal amounts (about 4 TBSP each) of:
    • dried cranberries
    • chopped up dried apricots
    • chopped up dried cherries
    • the following raw nuts (chopped up): almonds, pecans, walnuts, cashews (to be clear, 4 TBSP of each of them). Some green pistachios would have been nice for colour, but I didn’t have any. Maybe next time!
    • raw pepitas (green pumpkin seeds)
  • 1/3 cup of unsweeted coconut flakes
  • other topping ideas that you may want to consider: dried ginger, Goji berries, sunflower seeds, a VERY light sprinkle of coarse unrefined sea salt.

Step 1 (A to C): Melting the Chocolate Chips

A) Put a couple of inches of water in a sauce pan and bring it to a boil. Reduce to a healthy simmer over medium heat.

B: Put the chocolate chips, coconut oil, and cinnamon in the bowl, put the bowl over the pan.

C: Continually stir the chocolate chips with a spatula until ALMOST all the chips are fully melted, then take the bowl off the pot (use oven mitts!) and continue to stir until all the chocolate chips are fully melted and you have a nice, smooth bowl of melted chocolate.

Step 2: Create the Chocolate Base

Evenly pour the chocolate onto the wax-paper lined baking sheet. Use the spatula to get every last bit of that lovely melted chocolate out of the bowl and then use the spatula to evenly spread out the chocolate. Try to work as quickly as you can here as the toppings will ‘stick’ better to a chocolate base that is still warm and melty.

Step 3: Sprinkle and Pat Down the Toppings

Get your toppings and sprinkle them on evenly. I am VERY generous with my toppings. You can add more or less. I used the full 1.5 cups of topping and the 1/3 cup of coconut flakes. Feel free to use less if you don’t want your bark to be as loaded as mine was. Using a spatula or a flipper, GENTLY pat down the toppings to encourage them to stick to the chocolate. GENTLY, because I think it’s nicer to have a somewhat 3-D bark rather than one where all the toppings have been pushed into the chocolate.

Step 4: Set It Up … Then Break it Up!

Let your bark set until it is as hard as a chocolate bar. You can let it set at room temperature, but it will be faster if you put it in the fridge. I didn’t have room in my fridge so I put it out in the garage (early December in Ottawa – perfect temperature!) and it was ready in about 20 minutes. You’ll know it’s ready when you can easily snap a piece off (test a corner).

Once the bark is fully set, carefully peel off the wax paper, leaving the bark in the baking sheet. Using your hands, break the bark up into whatever sized pieces you want. It’s nice to have random sized pieces. Work quickly so the heat of your hands doesn’t melt the chocolate. Enjoy snacking on any toppings that fall off into the pan and/or any pieces of bark that are too small to serve. ;)

Step 5: Serve, Gift, or Save

Your chocolate bark creation is now ready to serve … or gift, or save. Bark will typically keep perfectly at room temperature for 5 to 7 days and in the fridge for several weeks (in an airtight container). You could also try freezing it, although sometimes this makes chocolate have white spots on it, especially if it’s in the freezer for over 6 months. Wrap several pieces up in celophane with ribbon for a lovely gift or loot bag at any time of year!

Enjoy!

Hearty Beef & Veggie Stew

I love slow cooked stews – especially at this time of year. They are easy to make, and you can throw in just about any vegetable you like/have on hand. Get it all ready in the morning and a meal is ready for you when you get back from a day at work … or play!

This stew recipe makes enough to feed 4 to 6 people and leftovers that freeze beautifully.

Note: if you don’t have a crock pot, you can also slow cook this stew in a large ‘oven-proof’ pot/pan/casserole dish (e.g. dutch oven, Creuset, etc) at 275F for 5 or 6 hours. This recipe can also be adapted to work in an ‘InstantPot’ type cooker.

You Will Need:

IMG_8873 WEB

  • 4 cups of chopped up root vegetables (whatever you like, e.g. parsnips, turnips, celeriac … I had a kohlrabi on hand so I threw that into the mix too)
  • 4 large carrots, washed or peeled and coarsely chopped
  • 4 lbs of stewing beef – local, organic, and pastured if possible (I had a 4 pound blade roast on hand, so cut that up into bite-sized pieces)
  • 2 TBSP of butter or olive oil (I used a combo of both)
  • 2 medium-sized onions, coarsely chopped
  • 3 or 4 cloves of garlic, minced
  • 2 cups of beef, chicken, or veggie broth
  • 1/2 cup of red wine
  • 4 cups of canned or fresh crushed tomatoes (drain them otherwise your stew might be too watery)
  • A few sprigs of fresh rosemary
  • Seasoning for the beef, e.g. salt and pepper to your taste and/or any other spices you enjoy with beef. You could even add a few TBSP of Worcestershire sauce if you like!

Step 1: Prepping Veggies

IMG_8877 WEB

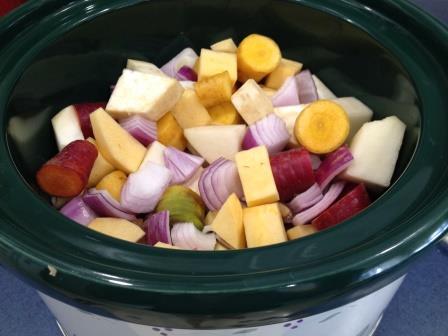
  • Put prepped root veggies, carrots, onions, and garlic in the crock pot
  • NOTE: if  you are using an InstantPot type cooker, do Step 2 first on ‘saute’ setting, then add everything else.

Step 2:  Prepping Beef

IMG_8876 WEB

  • Heat the butter in a skillet over medium-high heat
  • Season the beef (salt, pepper, whatever you wish – to your taste) and brown in the skillet
  • Once the beef is nicely browned, add it to the slow cooker with the veggies … include all the drippings! You could add a little of the broth to the pan to make sure you get all of the browned goodness off the pan and into the slow cooker!

Step 3:  Putting it all Together

  • Add the broth, tomatoes, wine, and rosemary to the crock pot
  • Turn to high for 1 hour, then to low for 8 or 9 hours (or until beef and veggies are tender)
  • Further season to your taste before serving if necessary

Step 4: Serve

IMG_8883 WEB

  • Top with fresh herbs and some fermented veggies (e.g. sauerkraut or carrots) if you have any on hand

Enjoy!

10 Herbal Teas That Offer Remarkable Health Benefits

With the cooler weather upon us, I find myself looking for soothing warm beverages, and since I’m not a coffee drinker, for me, this means enjoying a variety of herbal teas.

Herbal teas have been cherished for centuries for their various health benefits, soothing aromas, and delightful flavors. They are a natural and comforting way to promote well-being. Depending on your preference, they can be enjoyed hot or cold. In this blog, I share my 10 favourite herbal teas, in no particular order, as well as their main health boosting benefits, and finally, some important words of caution that you should be aware of.

#1 – Peppermint Tea

The main compounds in peppermint tea have antispasmodic effects. The term antispasmodic refers to a substance that relieves spasms of involuntary muscles, such as the ones that are found in our digestive tract. This is why peppermint tea is commonly used to calm digestive issues/irritations and to reduce bloating. Drinking a cup or two of peppermint tea, especially after meals, may help with digestion; however, for some people, peppermint tea may aggravate digestion, including causing heartburn. If you grow mint in your garden, here’s how you can reap its benefits, whether it’s fresh or dried.

#2 – Chamomile Tea

I have been drinking chamomile tea since I was a child. My parents are from Italy, and they always said that “camomilla guarisce migliaia”, which loosely translated means chamomile heals thousands of ailments. In our family, it was used to ‘calm everything down’, whether that was indigestion, nausea, PMS symptoms, or even anxiety and stress. We used it so much, my parents always had it growing in multiple areas of our flower and veggie gardens and would dry enough every fall to last us through to the next season. A couple of cups of chamomile in the evening is great for relaxation … unless drinking fluids in the evening makes you get up to urinate at night! One important caution regarding chamomile tea is that it should be avoided if you have ragweed allergies, which is something you may or may not know unless you’ve had a reaction to ragweed.

#3 – Ginger Tea

Ginger tea is one of my favourite teas to drink for no other reason than I love its taste and smell. Ginger tea has been used for thousands of years to calm nausea and indigestion. Ginger is also a great anti-inflammatory, immune system booster, and a general tonic for the female body. You can easily make ginger tea from fresh gingerroot. You’ll need about a one-inch piece of gingerroot that is about the thickness of your thumb per cup of water to make tea. Wash and/or peel it, slice it as thin as you can, put it in a pot with the water, bring to a boil, reduce to a gentle simmer for 5 to 10 minutes. The longer you simmer it, the stronger it will taste. Strain and serve. One common caution that I have often heard or read related to ginger tea is to avoid excessive consumption, especially when pregnant, as it may trigger contractions.

#4 – Turmeric Tea

Turmeric is best known for its powerful anti-inflammatory and anti-oxidant properties. It is most commonly used to support joint health and boost the immune system. Many sources claim that drinking 1 to 2 cups a day is all you need to reap this tea’s anti-inflammatory benefits. A word of caution regarding turmeric tea (and turmeric in general), is that for some individuals, it may cause stomach discomfort, so start slow if you’ve never tried it before.

#5 – Passionflower Tea

Passionflower tea is commonly associated with easing insomnia, improving sleep quality, and promoting relaxation. Some studies suggest that it works by increasing a substance called GABA in the brain. GABA is a naturally occurring substance that calms down the nervous system. For sleep support, it is recommended to sip on a cup of passionflower tea right before bed.

#6 – Echinacea Tea

Echinacea has long been used to enhance immune system function. It has been associated with reducing the risk of catching the common cold or flu as well as reducing their severity and duration. It is often recommended to drink 2 to 3 cups daily if you have a cold or flu; however, echinacea in any form, should not be consumed for extended periods as it may weaken the immune response. Many sources say that it is most effective to start taking echinacea as soon as cold/flu symptoms start, then continuing with it for 7 to 10 days.

#7 – Hibiscus Tea

Hibiscus tea is commonly linked to lowering blood pressure and is used as a common remedy for mild cases of high blood pressure in many countries. A cup or two a day is plenty.  If you have blood pressure issues, it is important to monitor your blood pressure should you start to drink hibiscus tea. It should be avoided if you have low blood pressure or are pregnant.

#8 – Dandelion Root Tea

Dandelions (flowers, leaves, and roots) were another common part of my childhood. Dandelion tea is commonly associated with supporting liver health, which in turn, supports detoxification. Dandelion root tea also acts as a natural diuretic. A diuretic is any substance that makes your body ‘lose’ water, usually by increasing urination. For this reason, a cup or two a day is plenty, and if you have any potassium, fluid, or blood imbalances, use caution with this tea.

#9 – Lemon Balm Tea

This is another one of my favourite teas. It smells amazing! It has been studied for its positive effects on virtually every health condition you can think of. It is most commonly associated with having a ‘calming’ effect. A common recommended dose is 2 to 3 cups per day. Note that lemon balm tea may cause drowsiness, so it should not be consumed before any activities that require alertness.

#10 – Rooibos Tea

Another one of my favourites, as it seems that no matter how long you steep it, it never tastes bitter. Rooibos’ claim to fame is that it is rich in antioxidants, as is green tea; however, it is naturally caffeine-free and has lower tannin levels than regular black or green tea. Tannins are natural compounds that interfere with the absorption of certain nutrients, including iron. Rooibos tea has been studied for its cardiovascular benefits and has been linked to potential cancer prevention. Many sources state that to reap this tea’s maximum benefits, 2 to 4 cups should be consumed daily. It is generally considered safe, but many sources suggest consulting a healthcare professional if pregnant or breastfeeding.

Do You Take Your Tea With One Lump or Two … of Plastic?

A 2019 study from McGill University found that certain tea bags release microplastic and nanoplastic particles into the water they are steeped in. That means that you may be consuming billions of these tiny plastic particles while sipping on your soothing cup of tea! The tea bags identified were mostly the fancy ‘silken’ pyramid-shaped tea bags, but there are other culprits. The researchers then looked at the effects these tiny plastic particles had on water fleas, and while the little creatures survived, they started to show some anatomical and behavioural abnormalities. Could these tiny plastic particles also affect us humans? I’ll error on the side of caution and avoid ‘plastic’ tea bags, for my own health, and for the health of the environment. Look for plastic-free tea bags (here’s a list of 25 … although I’m sure there’s more) or use loose tea leaves.

Last Drops …

There are numerous herbal teas that provide a great array of health benefits, and like everything else related to nutrition, variety and moderation is key. In terms of moderation, many sources state that 2 to 4 cups a day of most types of herbal tea is safe; however, it’s always best to consult with a healthcare professional, especially if you have any underlying medical conditions, are pregnant, or are routinely drinking considerable amounts of particular herbal teas. With the right choices and caution, herbal teas can become a delightful addition to your daily routine, promoting overall health and well-being.

Always follow the instructions on the package to maximize the benefits and flavour of your tea. For instance, the ideal water temperature, steeping time, whether you should cover your cup/mug when steeping, etc.

Enjoy!

Images from Pixabay

Nourish to Flourish! Healthy Snacks and Lunches for School

As parents and caregivers, we understand that nutrition is foundational to a child’s overall well-being and academic success. The choices we make when it comes to the foods and beverages we send to school with them can significantly impact their energy levels, concentration, and overall health. With the hustle and bustle of modern life, it’s easy to overlook the significance of packing healthy snacks and lunches for school. However, taking a little extra time to pack nutritious snacks and lunches can reap tremendous benefits for our children’s development. Let’s delve into the importance of this practice and explore 10 examples of healthy foods to pack in a child’s lunchbox.

The Importance of Healthy School Meals

  1. Fueling Concentration: Nutrient-dense foods like fruits, vegetables, whole grains, and healthy proteins and fats provide a steady supply of energy that can enhance a child’s focus and concentration throughout the school day.
  2. Supporting Growth: Children’s bodies are constantly growing and developing. Proper nutrition ensures they receive the essential vitamins, minerals, proteins, and fats needed for optimal growth and development.
  3. Boosting Immunity: A well-balanced diet can strengthen a child’s immune system, helping them fight off illnesses and reducing absenteeism from school.
  4. Maintaining Healthy Weight: Packing wholesome meals helps prevent the temptation of less nutritious options. This can contribute to maintaining a healthy weight, reducing the risk of childhood obesity.
  5. Building Lifelong Habits: Introducing nutritious foods early in life can establish healthy eating habits that extend into adulthood, promoting long-term wellness.

10 Healthy Foods for the Lunchbox

  1. Fresh Fruit: Apples are often the go-to fruit to include in lunch boxes; however, remember VARIETY when it comes to all things nutrition. Consider including berries (of all types!). They are delicious bite-sized nutritional powerhouses, loaded with vitamins, fiber, and antioxidants.
  2. Vegetable Sticks: An article I read some time ago said that only 10% of children’s lunches include vegetables. This needs to change! Baby carrots/carrot sticks, celery sticks, cucumber slices, red/orange/yellow bell peppers slices, and cherry tomatoes are great options for crunchy, vitamin-packed snacks. Kids love to dip stuff, so include some hummus or other healthy dip.
  3. Whole Grain Sandwiches: Opt for whole grain bread or wraps when making sandwiches. Note that ‘whole wheat’ is NOT whole grain. Always look for WHOLE GRAIN and make sure it is the FIRST ingredient on the list of any packaged bread or wrap you purchase. If you need to avoid gluten, look for grain products made with WHOLE GRAIN oats, buckwheat, quinoa, millet, and amaranth. There are lots of alternatives now, just rememeber that gluten-free doesn’t mean healthy. READ THE INGREDIENTS!
  4. Yogurt: Yogurt can be a healthy addition to a lunch box; however, make sure you read the nutrition label and check the amount of sugar as a single-serving sized container of flavoured yogurt may contain anywhere from 6 to 7 tsps of sugar! This goes for yogurt tubes and yogurt drinks too. READ THE LABEL and note that 4 grams of sugar = 1 tsp of sugar. Opt for WHOLE fat, plain, organic yogurt and add your own fresh fruit and a drizzle of honey or maple syrup if you want a bit more sweetness.
  5. Cheese: Cheese can be a good source of protein, fat, and calcium. The best options are WHOLE fat cheeses made with unpasteurized/raw milk, especially goat or sheep milk … grassfed is a bonus!
  6. Hard-Boiled Eggs: Eggs are one of Mother Nature’s  most perfect foods! They are a little package of healthy protein, carbs, and fats. Hard boiled eggs are a satisfying snack that can be easily prepared in advance. Eggs from pastured/free-range hens are the best if you can find them.
  7. Nuts* and Seeds: Almonds, walnuts, pecans, Brazil nuts, pumpkin seeds, sunflower seeds and so many other nuts and seeds are easy to pack and offer healthy fats, protein, and many essential nutrients. Opt for raw and unsalted varieties. Again, remember variety AND moderation!
  8. Whole Grain Crackers: These provide a satisfying crunch and can be paired with healthy sources of protein and fats, such as cheese, nut & seed butters, or hummus. Once again, remember that whole wheat does not equal whole grain!
  9. Homemade Trail Mix: Create a mix of raw nuts* and seeds, dried fruits (sulphite-free if possible!), and a few dark chocolate chips for a sweet treat with nutritional value.
  10. Homemade Treats*: Check out the recipe section at www.perfectresonance.com for some healthy treats, including:

* make sure to check your school’s nut policy

Incorporating Healthy Choices into the Routine

Packing healthy snacks and lunches for school doesn’t have to be a daunting task. With a little planning and creativity, you can make nutritious meals that your child will love. Here are a few tips to consider:

  1. Plan Ahead: Take some time to plan the week’s meals in advance to ensure you have all the necessary ingredients on hand.
  2. Involve Your Child: Let your child help choose fruits, veggies, and snacks they enjoy. This involvement can increase their enthusiasm for healthier options.
  3. Variety is Key: Rotate different foods to keep things interesting and to provide a wide range of nutrients.
  4. Prep in Batches: Wash, chop, and portion out fruits and veggies ahead of time to make assembly quick and easy.
  5. Stay Hydrated: Don’t forget to pack a reusable water bottle to keep your child hydrated throughout the day. Water is the best beverage to keep your child healthy and hydrated. 

Presentation Counts!

Fun & kid-friendly containers can help transform lunch-bag letdown into lunch-bag fun! My kids are all grown up now, but our favourite lunch gear was from a company called Bentology. Bentology products are designed to help you pack nutritious bento box style lunches for school (or work … or play!). The unique design of this durable line of products makes it easy to break free of the sandwich mentality, and as a bonus, the products are free of phthalates, BPA, PVC, or lead.

By packing healthy snacks and lunches for school, you are investing in your child’s well-being and future. These small efforts can yield significant benefits, fostering their growth, learning, and overall health. Remember, the choices you make today can have a lasting impact on their tomorrow.

4 Refreshing Low-Cal Summer Mocktails

Enjoying a cold cocktail is often associated with summer – especially summer weekends (with two more long weekends to come as I write this!). With the mounting research indicating the serious negative effects alcohol consumption has on our health (not to mention the empty calories in these often sugary cocktails), you may want to consider some healthier yummy alternatives. In this blog, I’m sharing four delightful low-calorie mocktails that offer a variety of fruity, herby, and tropical options that will satisfy your cravings and keep you on track with your health and fitness goals. Note that each recipe makes 2 servings.  

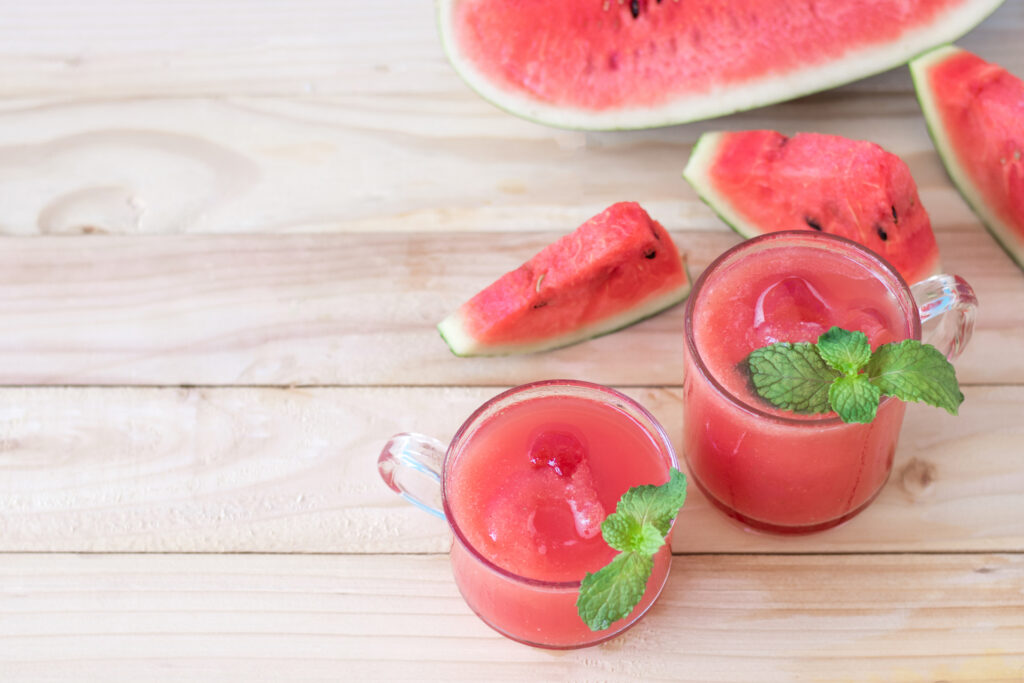
Sparkling Watermelon Lime Cooler

image from vecteezy.com

Ingredients:
• 2 cups diced watermelon
• 1 lime, juiced
• 1 cup sparkling water
• Fresh mint leaves for garnish
• Ice cubes

Instructions:
1. In a blender, puree the watermelon until smooth.
2. Pour the watermelon puree into a pitcher and add lime juice. Stir well to combine.
4. Fill glasses with ice cubes and pour the watermelon-lime mixture over the ice.
5. Top each glass with sparkling water and gently stir.
6. Garnish with fresh mint leaves.
7. Serve chilled and enjoy the refreshing taste of summer!

Cucumber Basil Lemonade

image from vecteezy.com

Ingredients:
• 1 large cucumber, peeled and chopped
• 10-12 fresh basil leaves
• 2 lemons, juiced
• 1 tablespoon honey or agave syrup (optional for sweetness)
• 2 cups cold water
• Ice cubes

Instructions:
1. In a blender, combine cucumber, basil leaves, lemon juice, and water. Blend until smooth.
3. Taste and add honey, maple syrup, or stevia if desired for sweetness.
4. Fill glasses with ice cubes and pour the cucumber basil mixture over the ice.
5. Stir gently and garnish with a basil leaf or cucumber slice.
6. Serve chilled and enjoy the revitalizing flavors!

Berry Blast Mocktail

image by rawpixel.com

Ingredients:
• 1 cup mixed berries (strawberries, blueberries, raspberries)
• 1 tablespoon freshly squeezed lemon juice
• 1 cup unsweetened cranberry juice
• 1 cup soda water
• Ice cubes
• Fresh mint leaves for garnish

Instructions:
1. In a blender, puree the mixed berries until smooth.
2. Strain the berry puree to remove any seeds (if you’d prefer no seeds).
3. In a pitcher, combine the strained berry puree, lemon juice, and cranberry juice. Stir well to combine.
5. Fill glasses with ice cubes and pour the berry mixture over the ice.
6. Top each glass with soda water and stir gently.
7. Garnish with fresh mint leaves.
8. Serve chilled and savor the burst of fruity goodness!

Tropical Paradise Mocktail

image by rawpixel.com

Ingredients:
• ½ cup fresh or canned pineapple chunks
• 1 medium sized orange, cut up into chunks
• ¼ cup unsweetened coconut milk
• 1 tablespoon freshly squeezed lime juice
• Splash of cranberry or pomegranate juice (for colour – optional!)
• Ice cubes
• Pineapple wedge or orange slice for garnish

Instructions:
1. In a shaker, combine pineapple, orange, coconut milk, lime juice, and cranberry or pomegrante juice (if using).
2. Shake well until all ingredients are thoroughly mixed.
3. Fill glasses with ice cubes and pour the tropical mixture over the ice.
4. Stir gently and garnish with a pineapple wedge or cherry.
5. Serve chilled and transport yourself to a tropical paradise!


Cheers to your health!


Image attribution:

Cover, Berry Blast Mocktail,and Tropical Paradise Mocktail:  Image by rawpixel.com

Watermelon Lime Cooler, Cucumber Basil Lemonade, image by vecteezy.com

Privacy Policy